Help Documentation
Insurgent Wordpress Theme
Thank you for purchasing our theme ! Please take the time to read through the following sections before asking for support. As many support related questions can be answered simply by re-reading the documentation.
 Envato
 Facebook
 Behance
1 - First Steps
Installation - First Steps
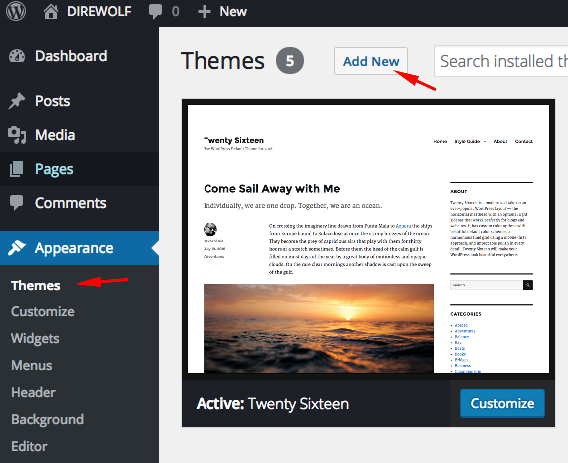
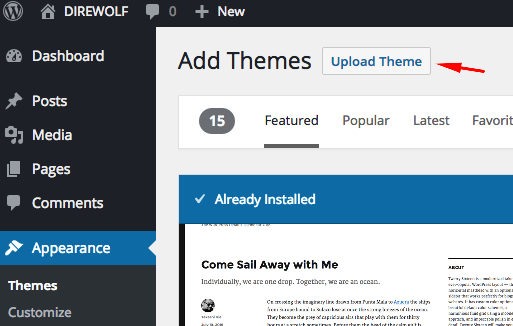
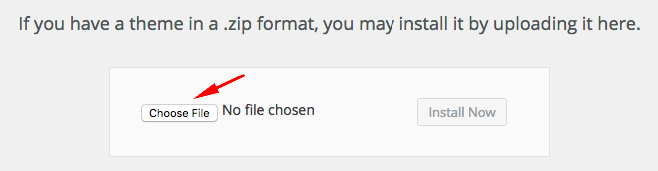
The first thing you need to do when you want to install a new WordPress theme is to login to your site admin page. Once there, go to Appearance -> Themes. Here, you will see all the themes you have currently installed in your application. To add another one, simply click on the Install Themes tab. Upload the zip package which you have downloaded from Themeforest from your local hard drive.
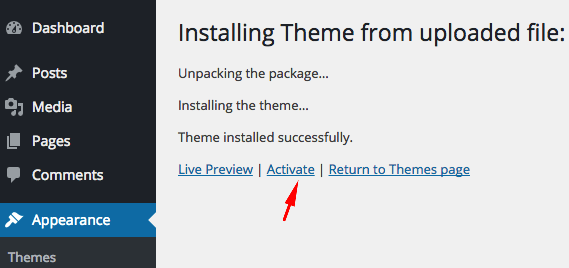
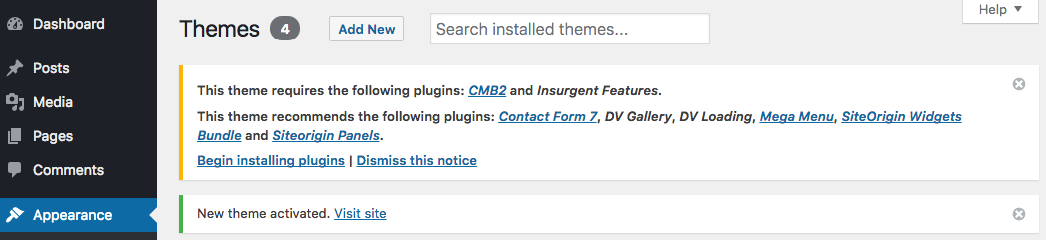
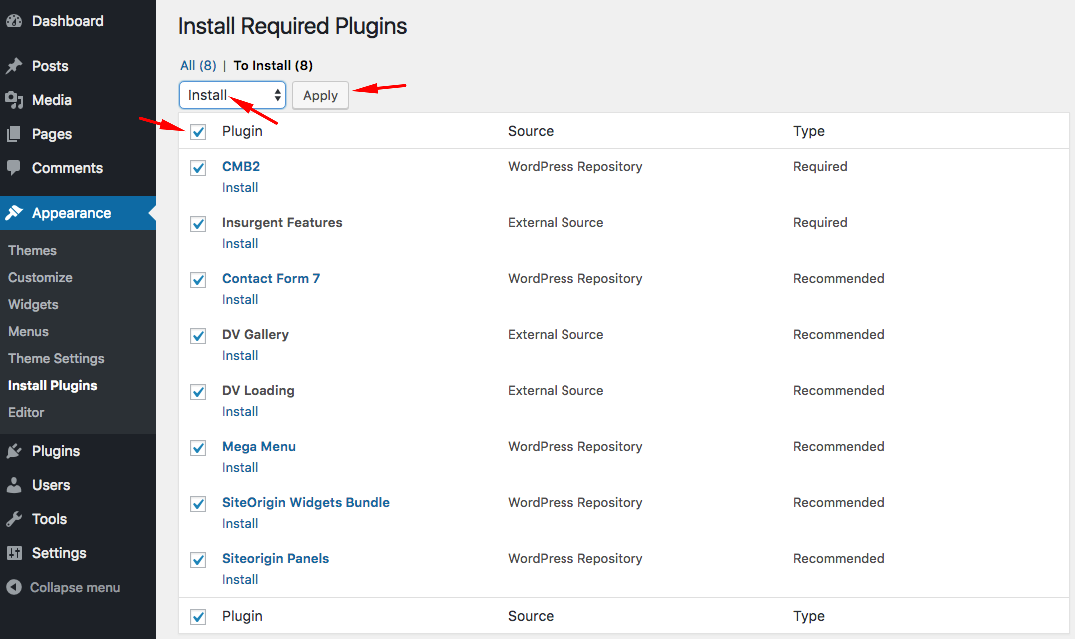
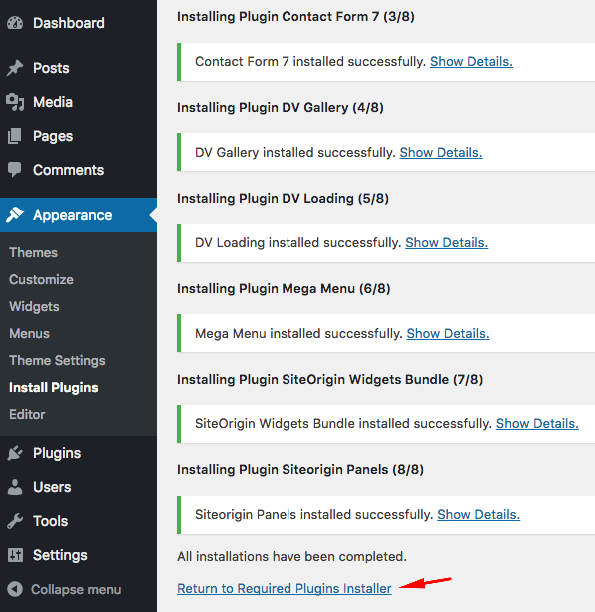
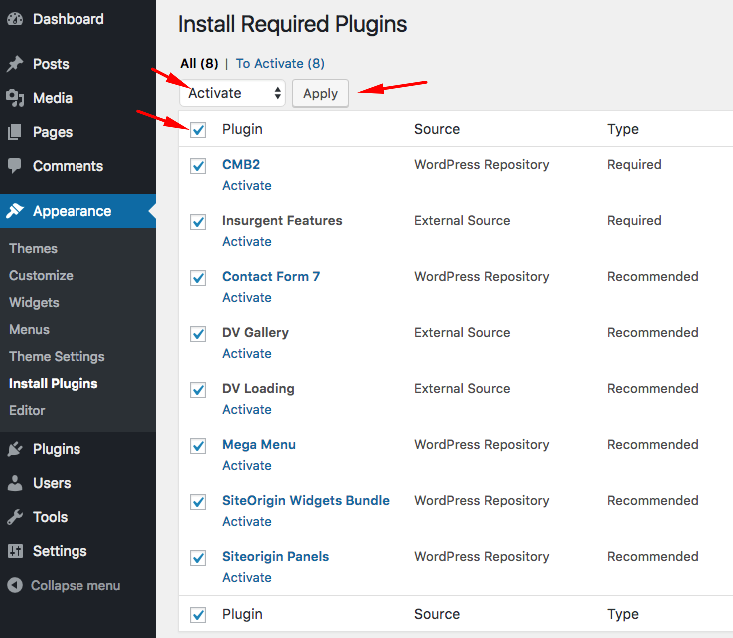
If you want to use the theme with all available features (Custom post types,shortcodes,widgets,page builder...etc), you should upload and activate all the required plugins. After the installation of the theme, you will see a message about them. Click "Begin Installing Plugins", install the plugins and activate them.
Loading Demo Content - First Steps
To upload the demo content (posts,pages,menus etc.) to your website, download the following zip file;
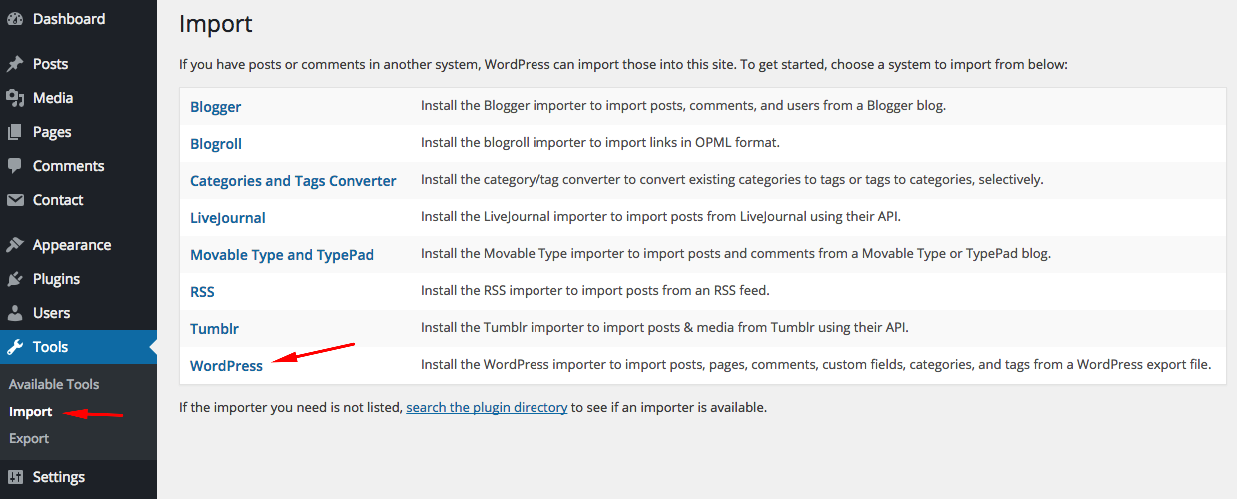
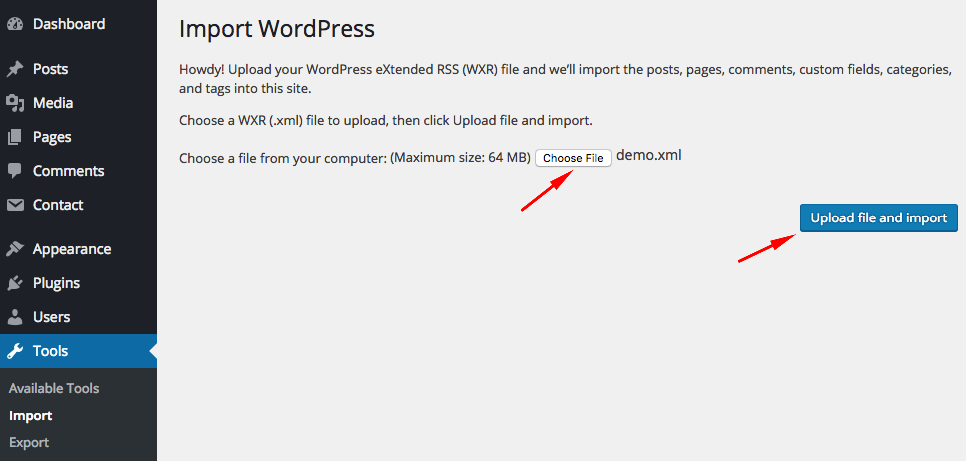
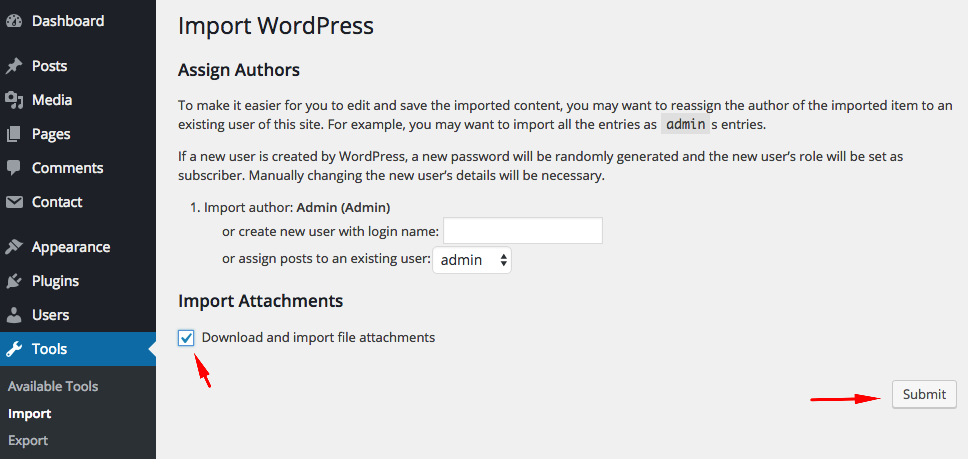
Open the zip file. You will find demo.xml file.You can use WordPress import tool to upload this xml file to your website.
For more information about importing content in WordPress; please visit wordpress.org
After the demo installation, you should set up sidebars ,select a front page and set up Appearance->Theme Settings manually. Please read the following sections for more information.
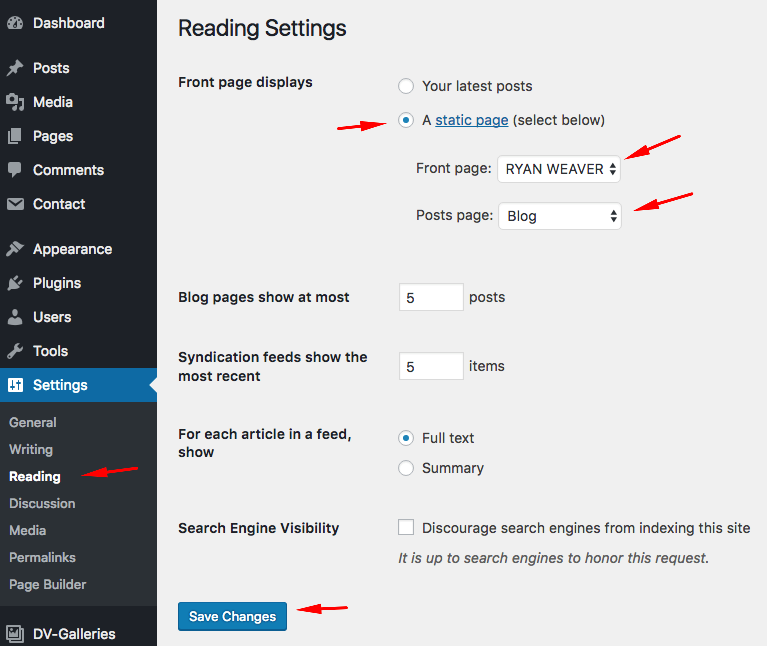
Creating Front Page & Blog Page - First Steps
First of all, you should create a new blank page for your frontpage display.
Go to Settings->Reading and select in the drop-down box this page for the front page display.
To create a blog page, create another blank page.
Go to Settings->Reading and select in the drop-down box the name of the Page that will now contain your Posts. If you do not select a Page here, your Posts will only be accessible via other navigation features such as category, calendar, or archive links.
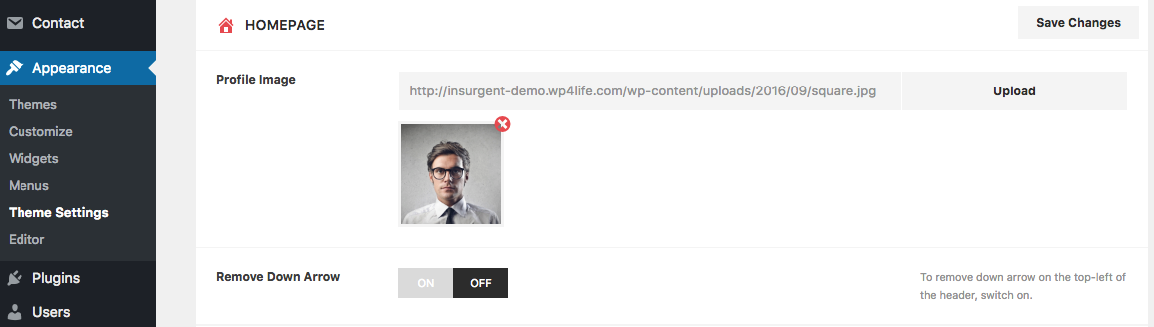
Adding profile image - First Steps
You can upload your profile image from Appearance->Theme Settings->General.
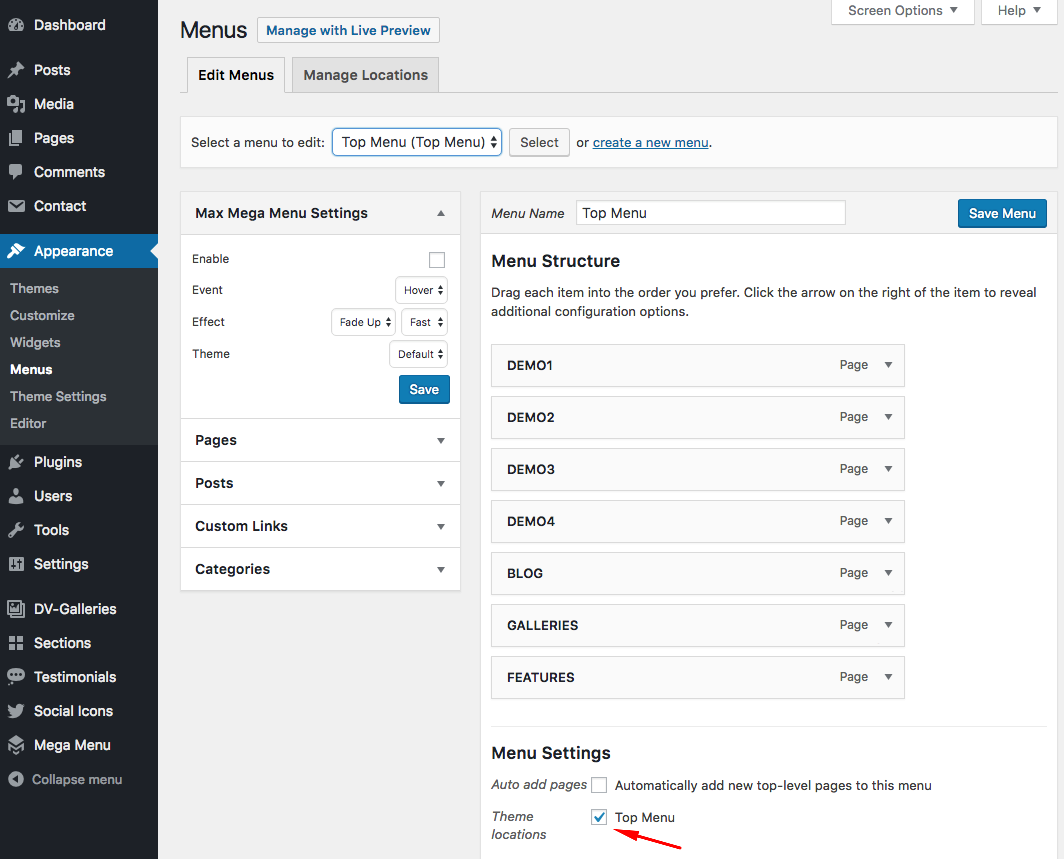
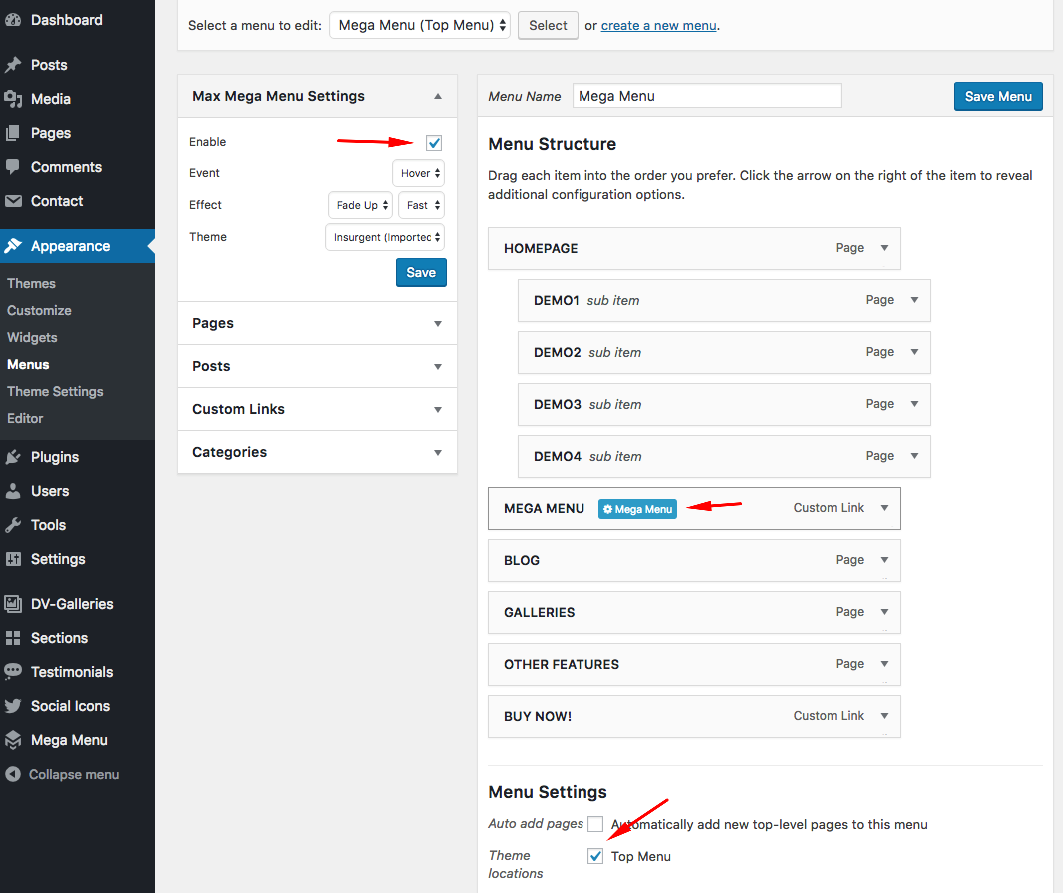
You can create menus from Appearance->Menus page. After creating your menus, you must manage your menu location (Top Menu).
For more information about WordPress menus, please read the WordPress menu guide
Hidden Menu
Hidden menu is default menu of Insurgent. It doesn't support dropdown menus and it is visible only when you click menu icon. If you just need to add a few page links, external links etc. to your menu, we suggest you to use hidden menu.
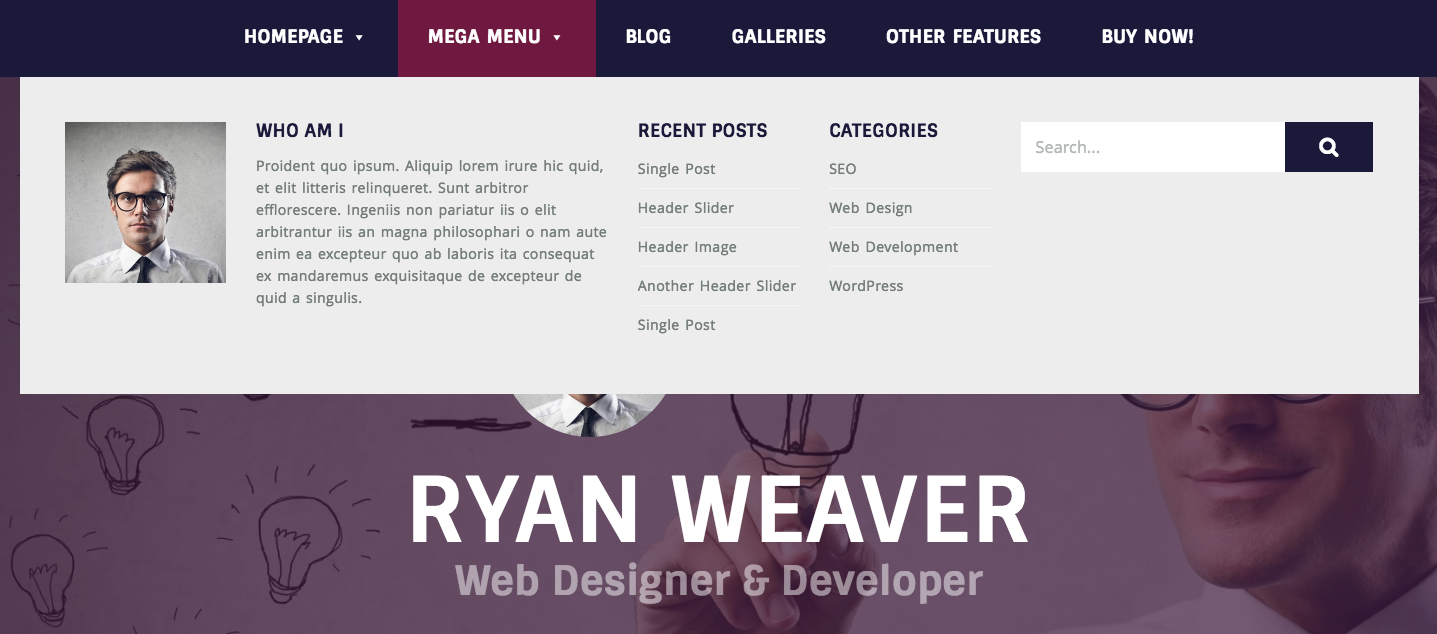
Mega Menu
If you need an advanced menu which supports flyout menus, mega menus etc. You can use the following plugin (It is already in the theme package);
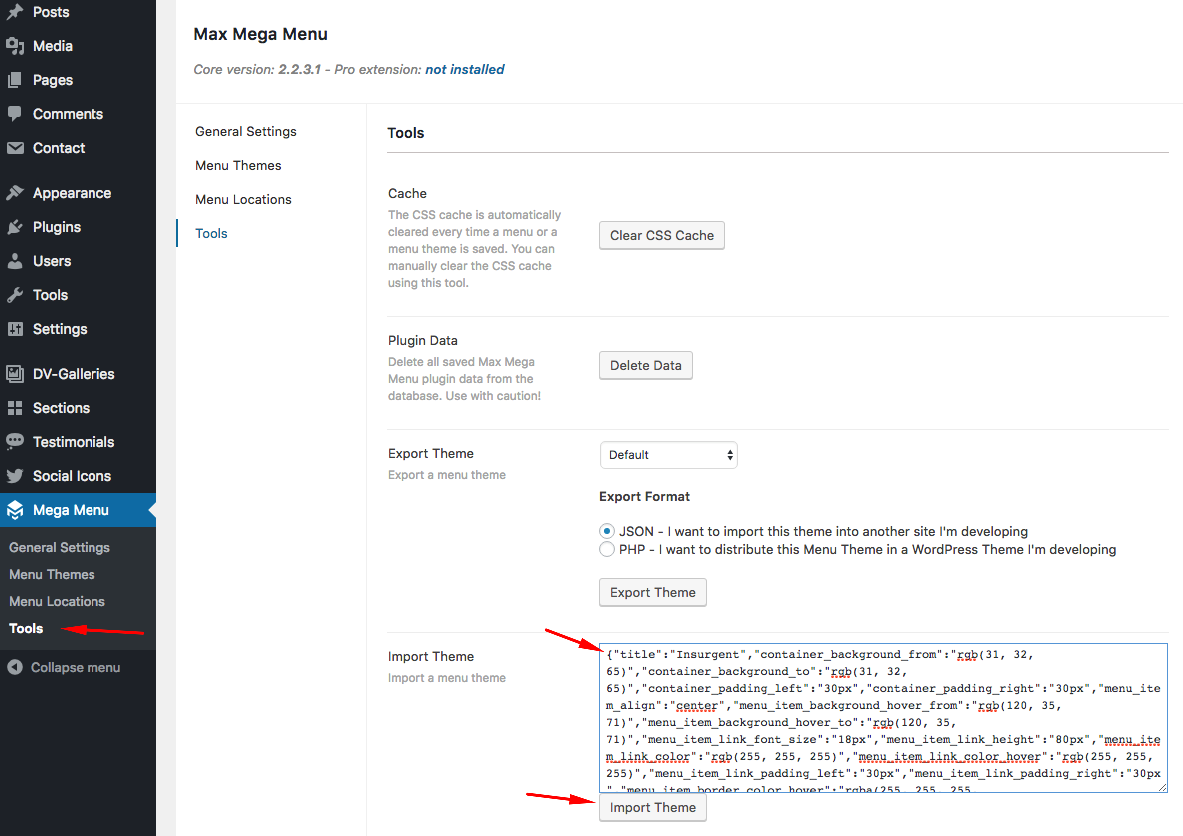
Mega Menu Theme
To upload "Insurgent Mega Menu Theme", go to Mega Menu->Tools.
Copy paste the following code to "Import Theme" field and click "Import Theme" button.
After the installation, you can edit the menu theme from Mega Menu->Menu Themes page.
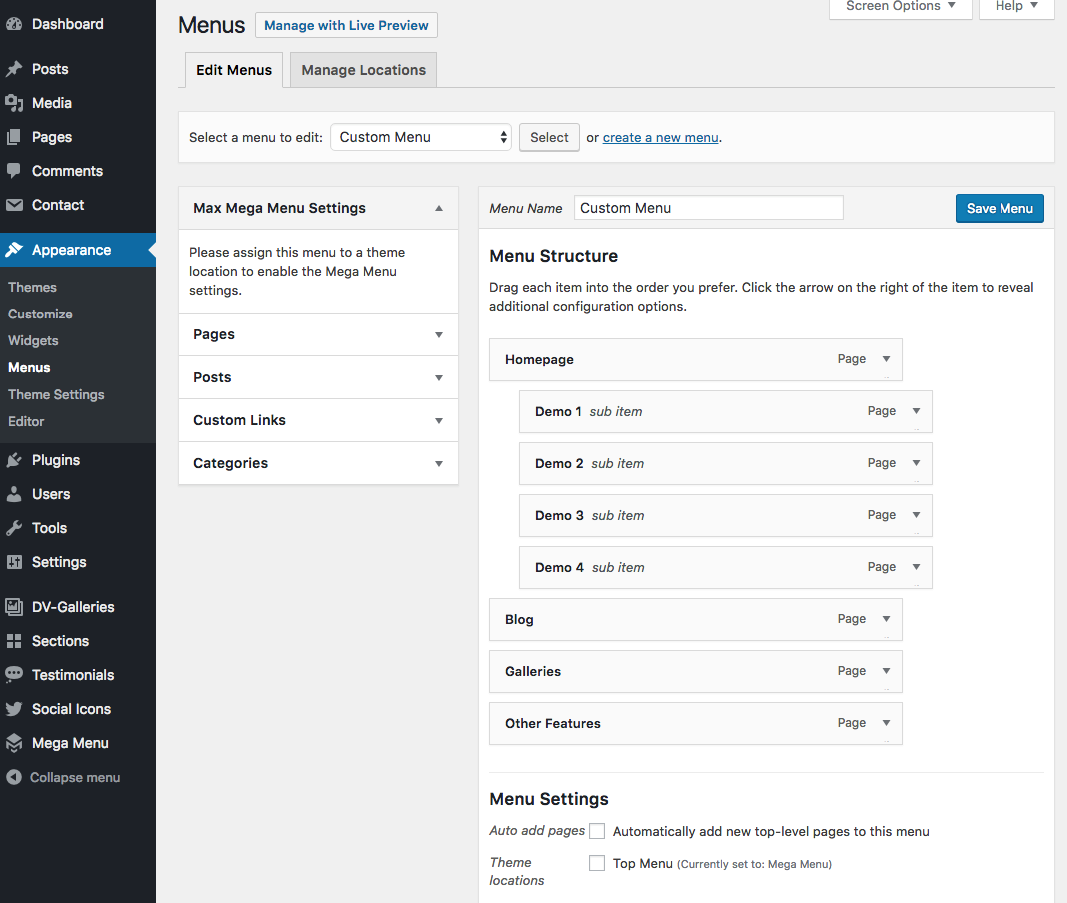
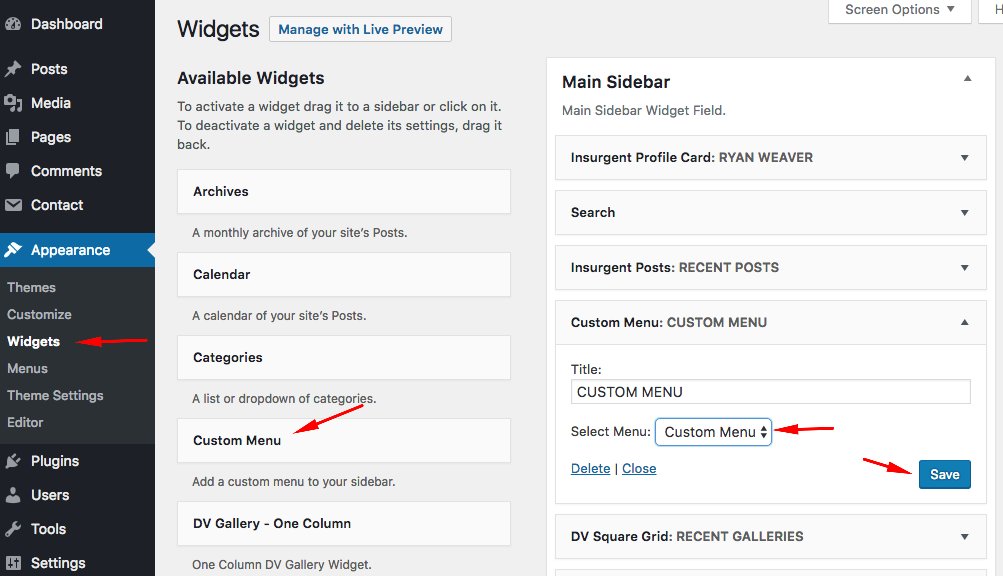
Custom Menu
Another way to use a WordPress menu is using custom menu widget. You can use this widget to add your menus to any widget area.
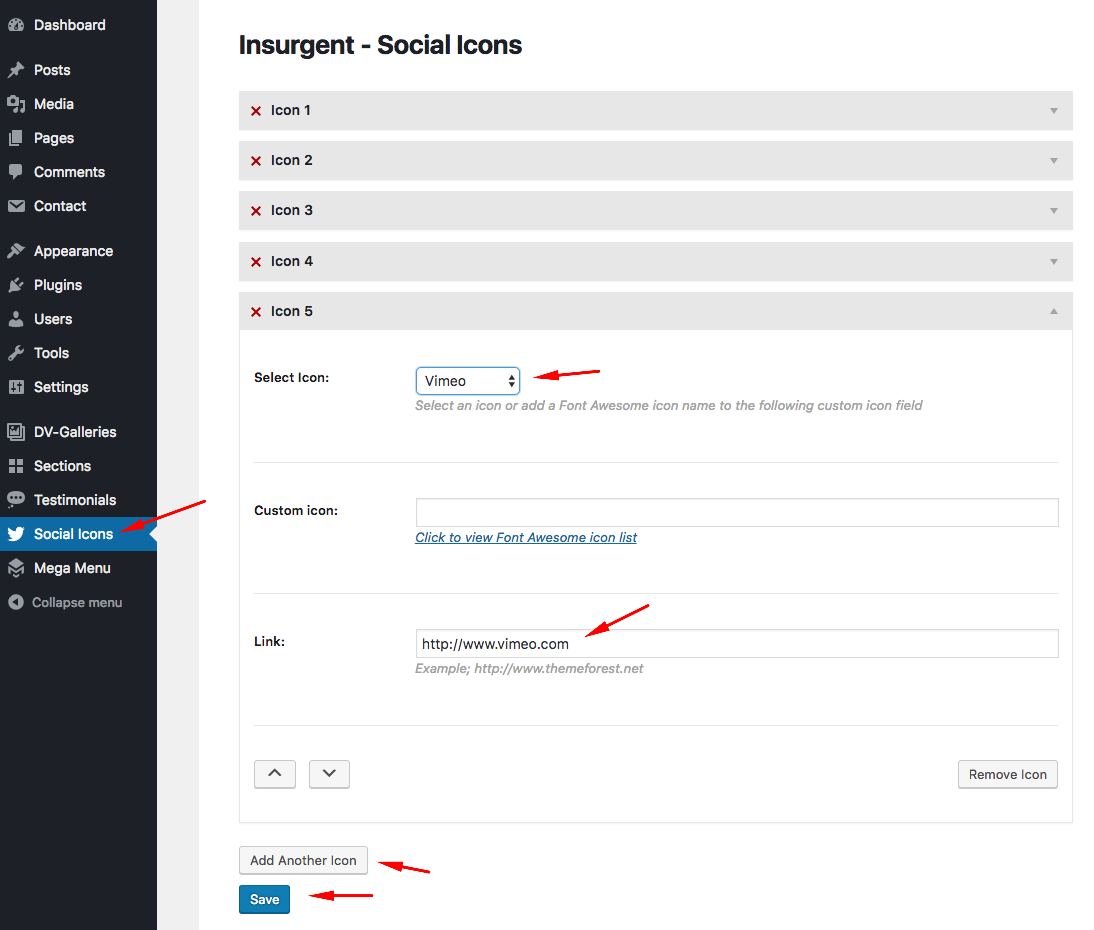
To add the social media icons to your homepage, just fill the required fields and click "Add Another Icon" to add a new icon or click "Save".
You can also use SiteOrigin Social Media Buttons widget to add social icons to any widget area. To use this widget, you should upload/activate SiteOrigin Widget Bundle plugin.
Page Templates - First Steps
- Default Template
- This is the default full width page template.
- Page - Sidebar
- There is a sidebar field on this template. You can add widgets to "Page Sidebar" from Appearance->Widgets page.
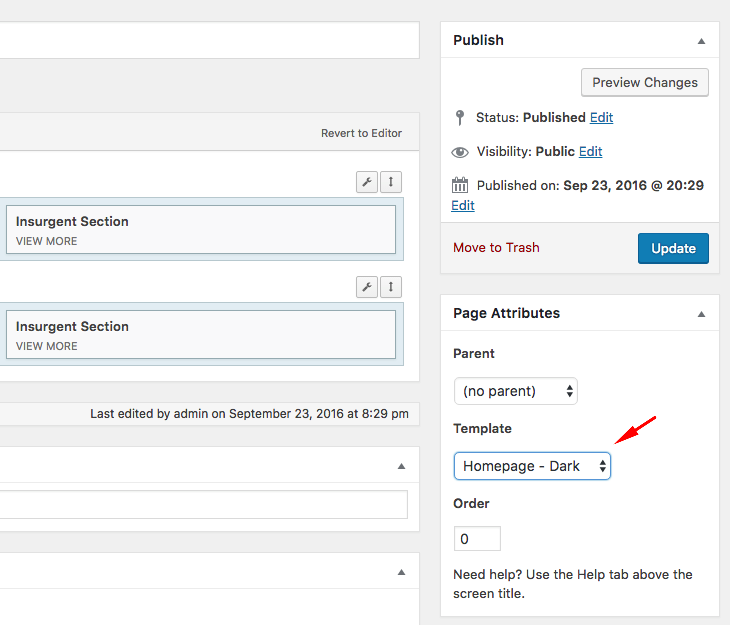
- Homepage Templates
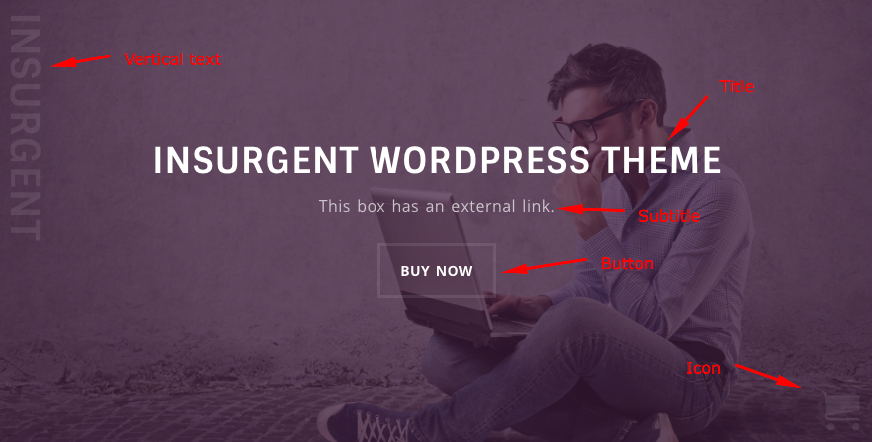
- Homepage templates has a header field which displays your name, surname, social media icons and profile image.
2 - Header
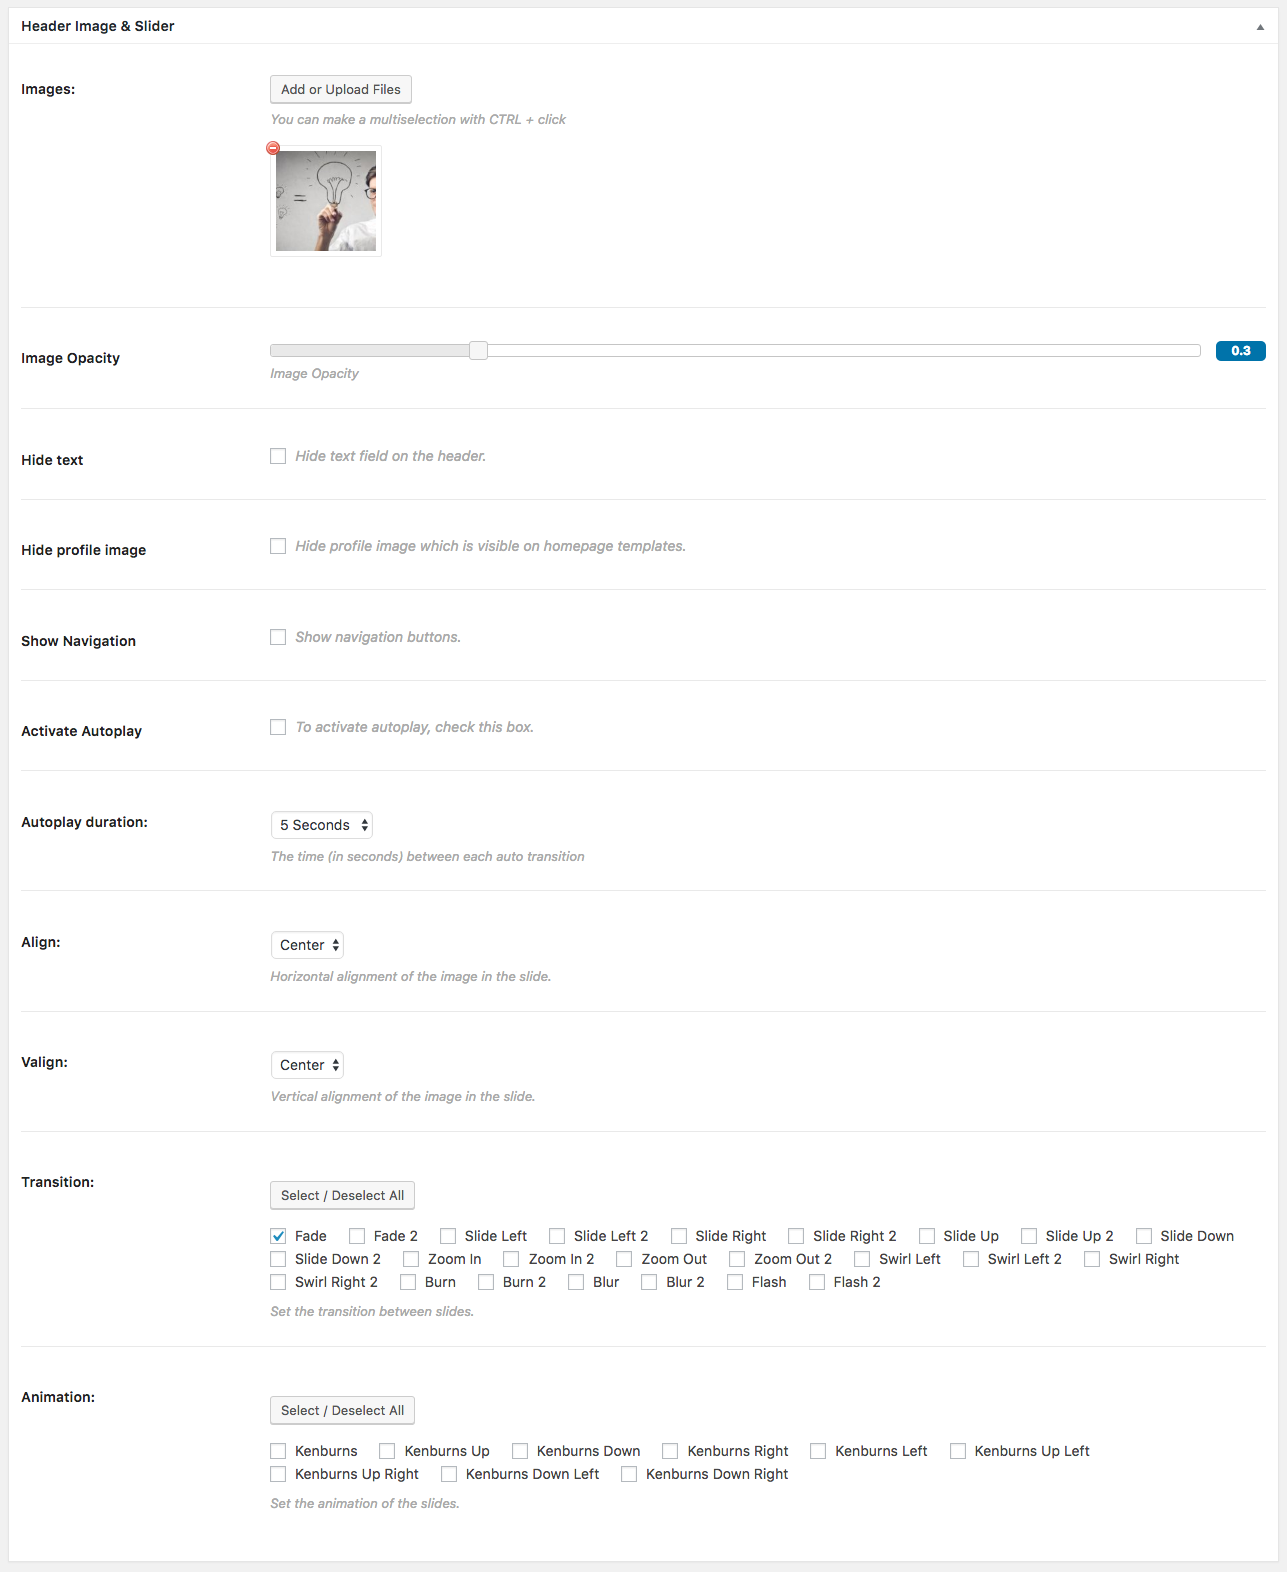
There is a Header Image & Slider field on post and pages. Header images are optional and can be added to any page or post.
Form Fields
- Images
- If you add/upload one image, there will be a background image on your header. If you add/upload multiple image, there will be a background image slider on your header.
- Image Opacity
- The opacity of your header images.
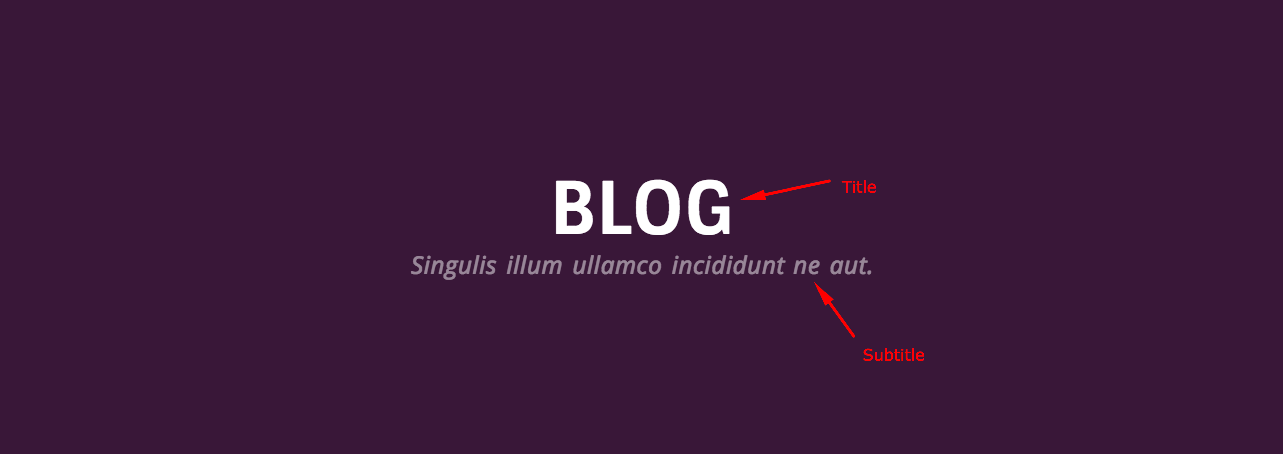
- Hide text
- If you want to hide the texts (title and subtitle) on the header, check this box.
- Hide Profile Image
- There is a Profile Image on the homepage templates. If you need to hide it on a homepage template, check this box.
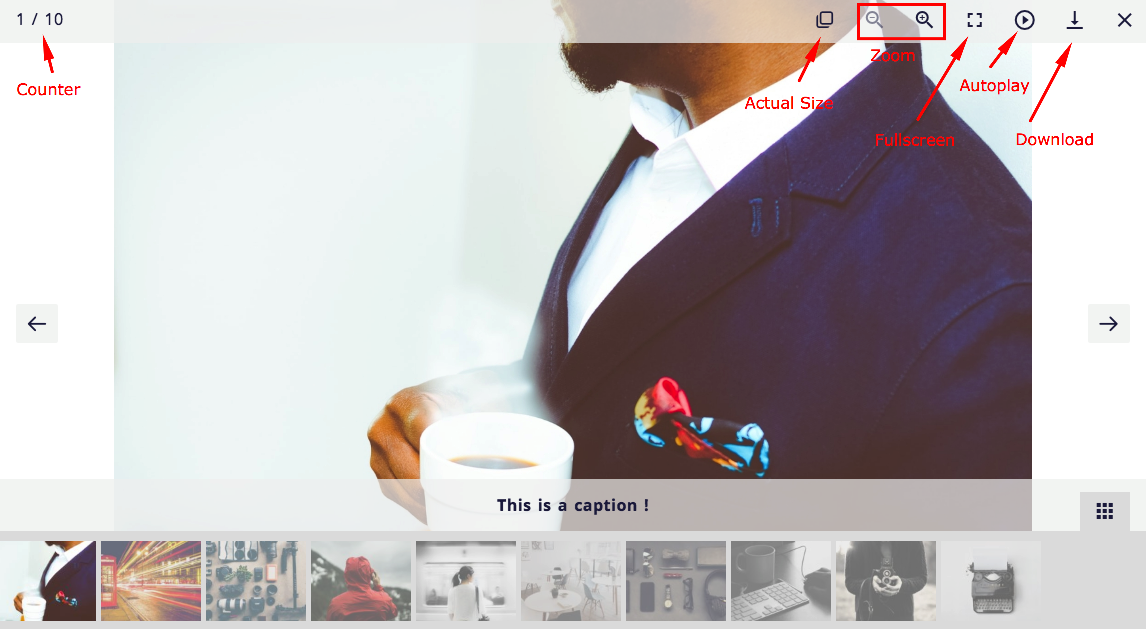
- Show Navigation
- To display navigation arrows, check this box.
- Activate Autoplay
- To activate autoplay, check this box.
- Autoplay duration
- The time (in seconds) between each auto transition
- Align
- Horizontal alignment of the image in the slide.
- Valign
- Vertical alignment of the image in the slide.
- Transition
- The transition between slides.
- Animation
- The animation of the slides.
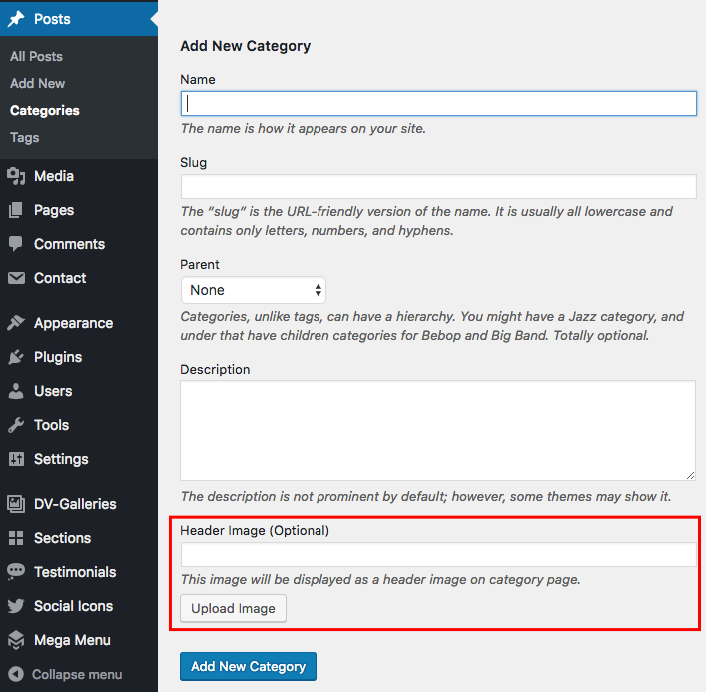
There is an additional header image field on the category pages.You can use this field to add header images to your post category pages.
3 - Theme Settings
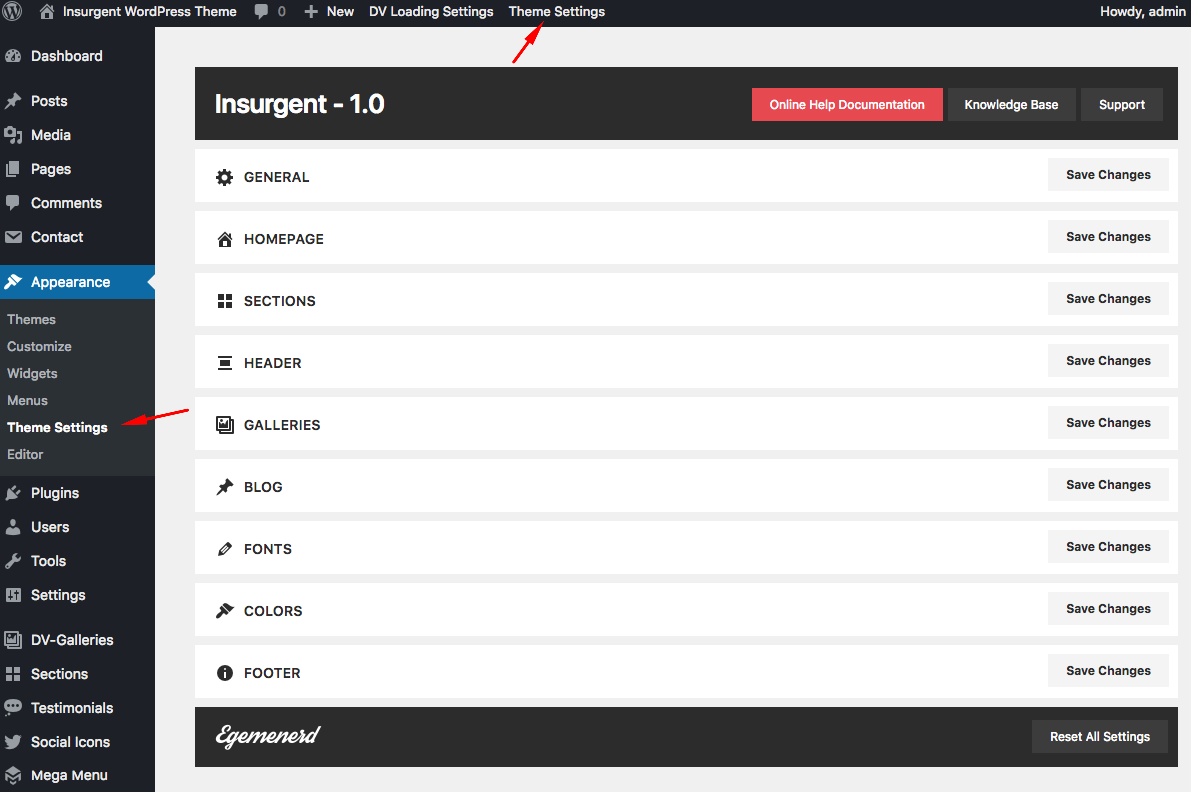
General - Theme Settings
- Custom CSS
- You can add all your custom CSS here and avoid modifying the core theme files, since that'll make upgrading the theme problematic. Your custom CSS will be loaded after the theme's stylesheets, which means that your rules will take precedence. Just add your CSS here for what you want to change, you don't need to copy all the theme's style.css content.
- Contact form 7 loader
- Recommended image size is 26x26 px.
Homepage - Theme Settings
This section contains the settings of the Homepage Templates
- Profile Image
- This thumbnail is only displayed on homepage templates.
- Rounded Profile Image
- To display a completely rounded profile image, switch on.
- Font Sizes
- You can change font sizes according to different screen sizes.
- Line Height
- The line-height property specifies the line height.
- Remove padding
- You can remove the spacing around the logo.
Blog - Theme Settings
This section contains the settings of the blog pages.
- Blog Subtitle
- Subtitle of your blog, archive, category, search etc. pages (Optional).
- Blog Header Image
- Header Image of your blog, archive, category, search etc. pages (Optional).
- Remove post data
- To remove post data (Author name, categories, tags) from single post pages, switch on.
- Remove sidebar
- To remove sidebar from single blog posts, switch on.
Fonts - Theme Settings
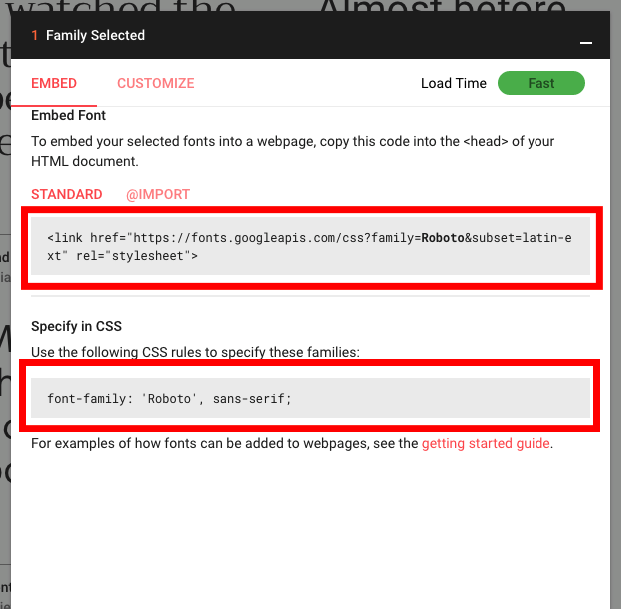
Insurgent supports Google Web Fonts. To change default fonts, please follow the following steps;
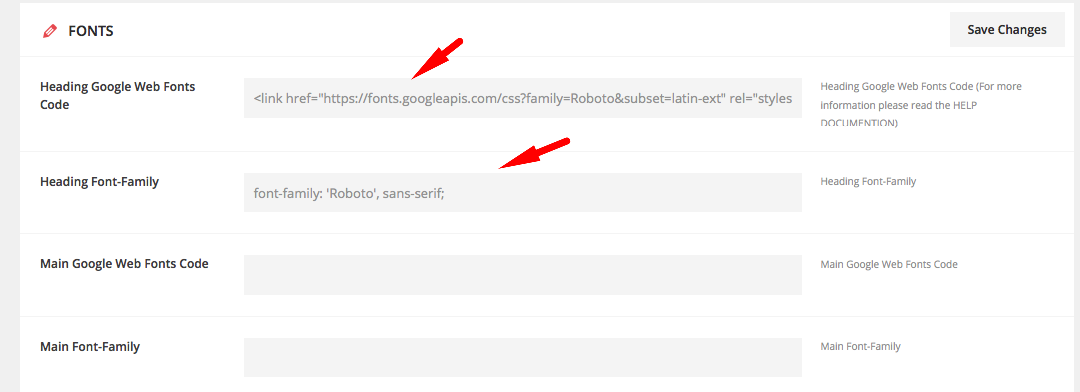
Choose a font and click "plus" button on the top right corder of the font. After that copy the codes (like on the screenshots) and paste them to the fields on the theme settings page.
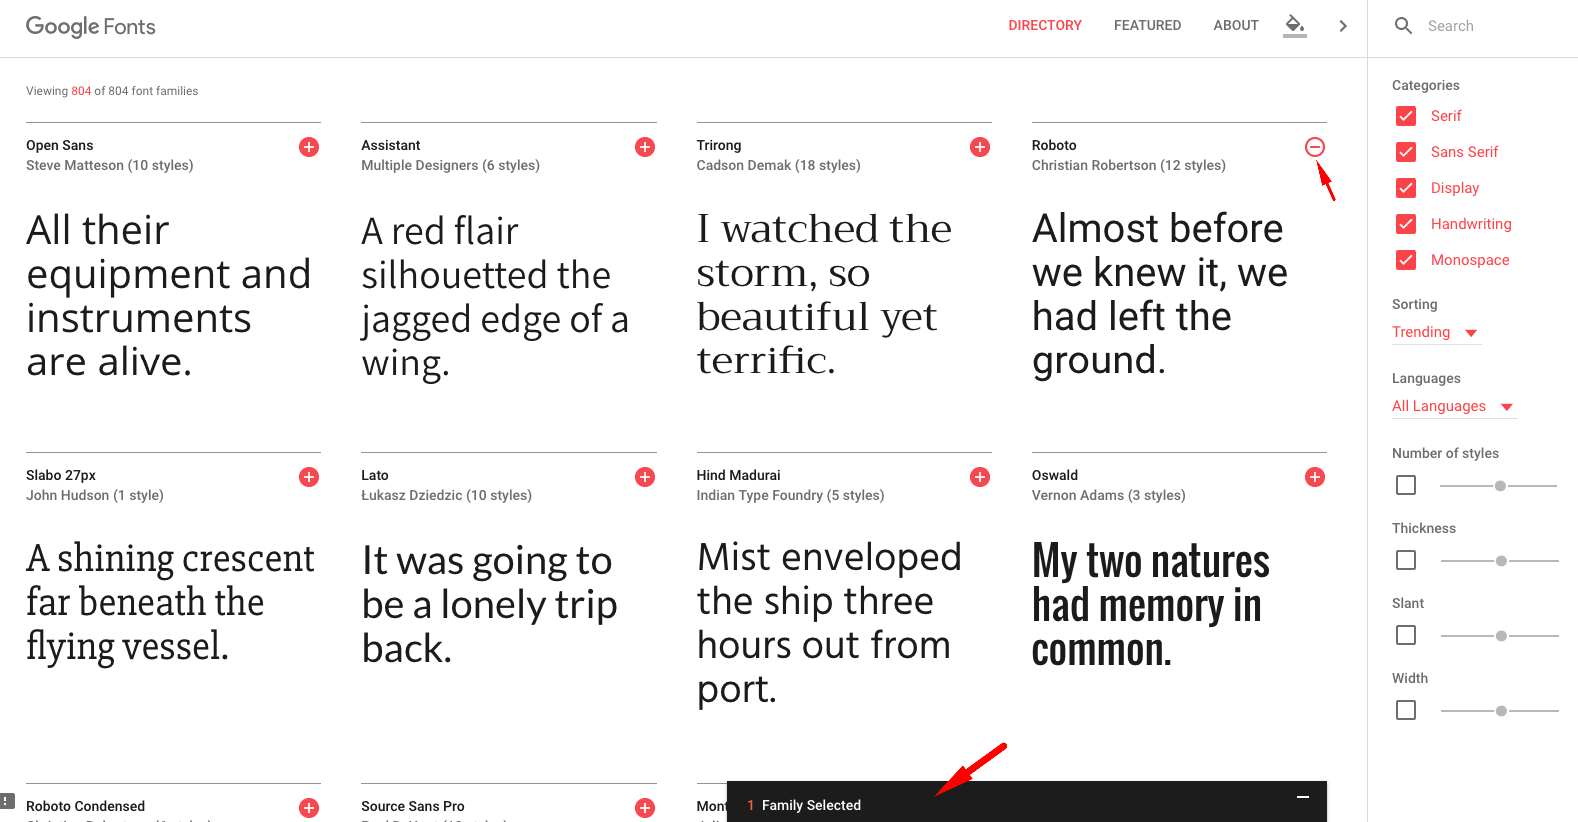
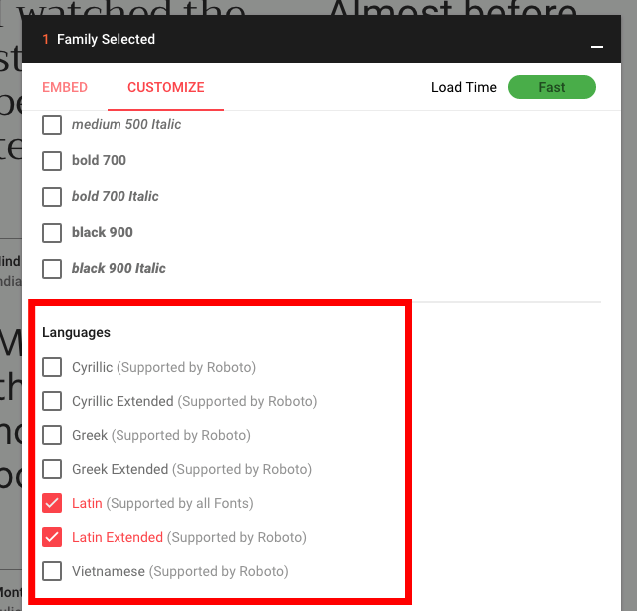
Don't forget to check "customize" tab. You may need to check some boxes on this section.
You also can change the default font sizes from this theme settings section.
Colors - Theme Settings
You can change default dark colors of the theme from this section.
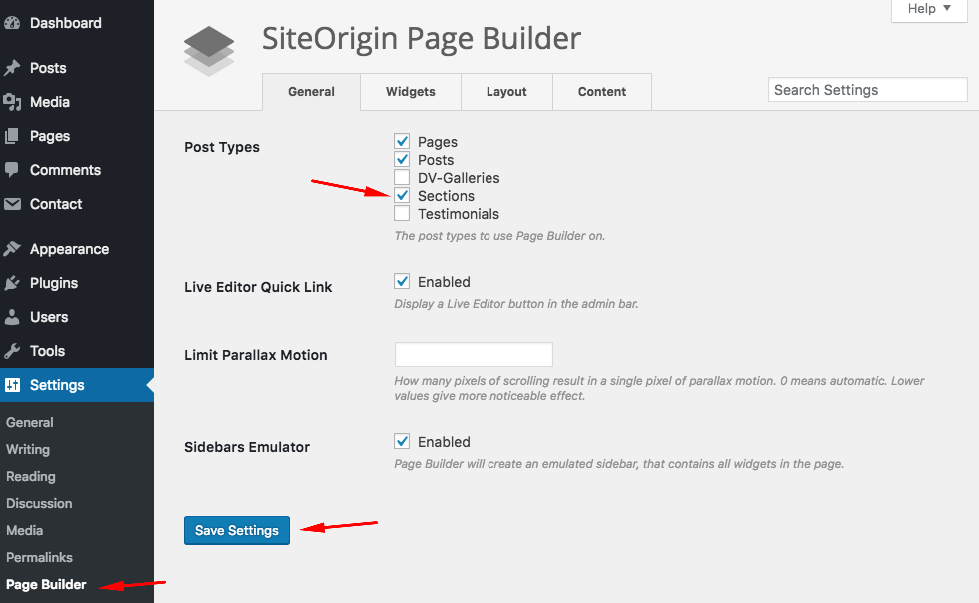
3 - Page Builder
You should install/activate following plugins to use the page builder and all available widgets to build your pages;
Insurgent Features
Siteorigin Page Builder
Page Builder by SiteOrigin is the most popular page creation plugin for WordPress. It makes it easy to create responsive column based content, using the widgets you know and love. Your content will accurately adapt to all mobile devices, ensuring your site is mobile-ready.
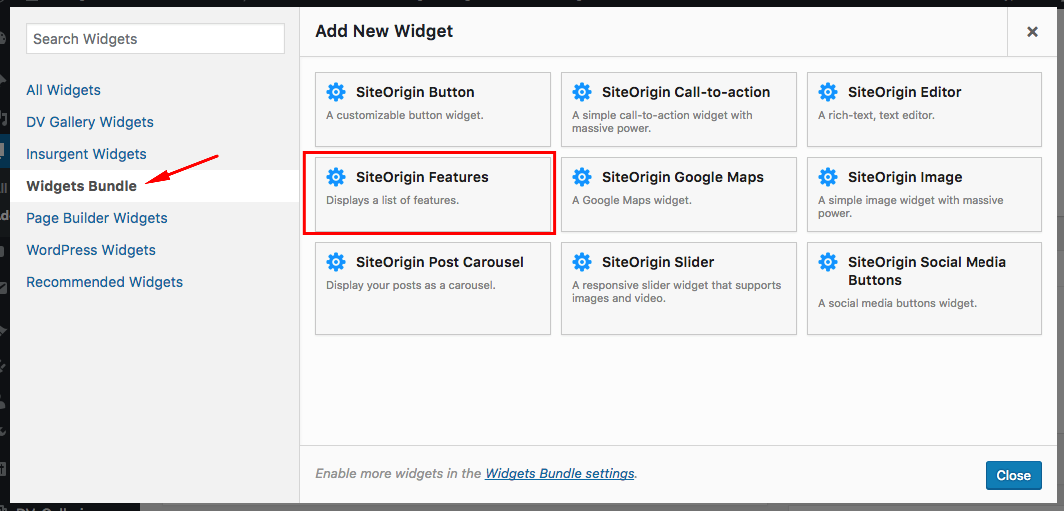
Siteorigin Widget Bundle
The SiteOrigin widget bundle gives you a collection of widgets that you can use and customize.
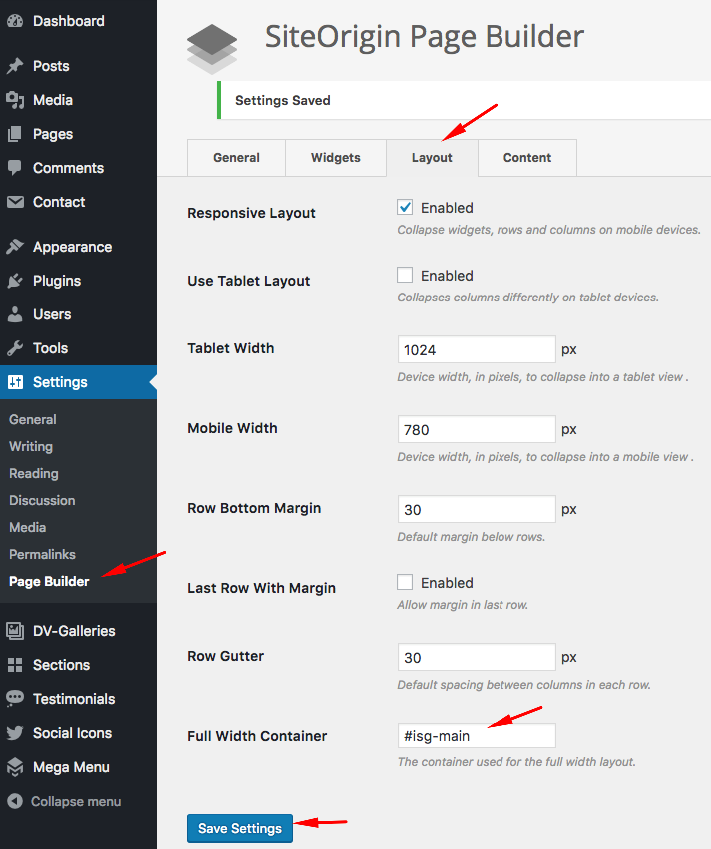
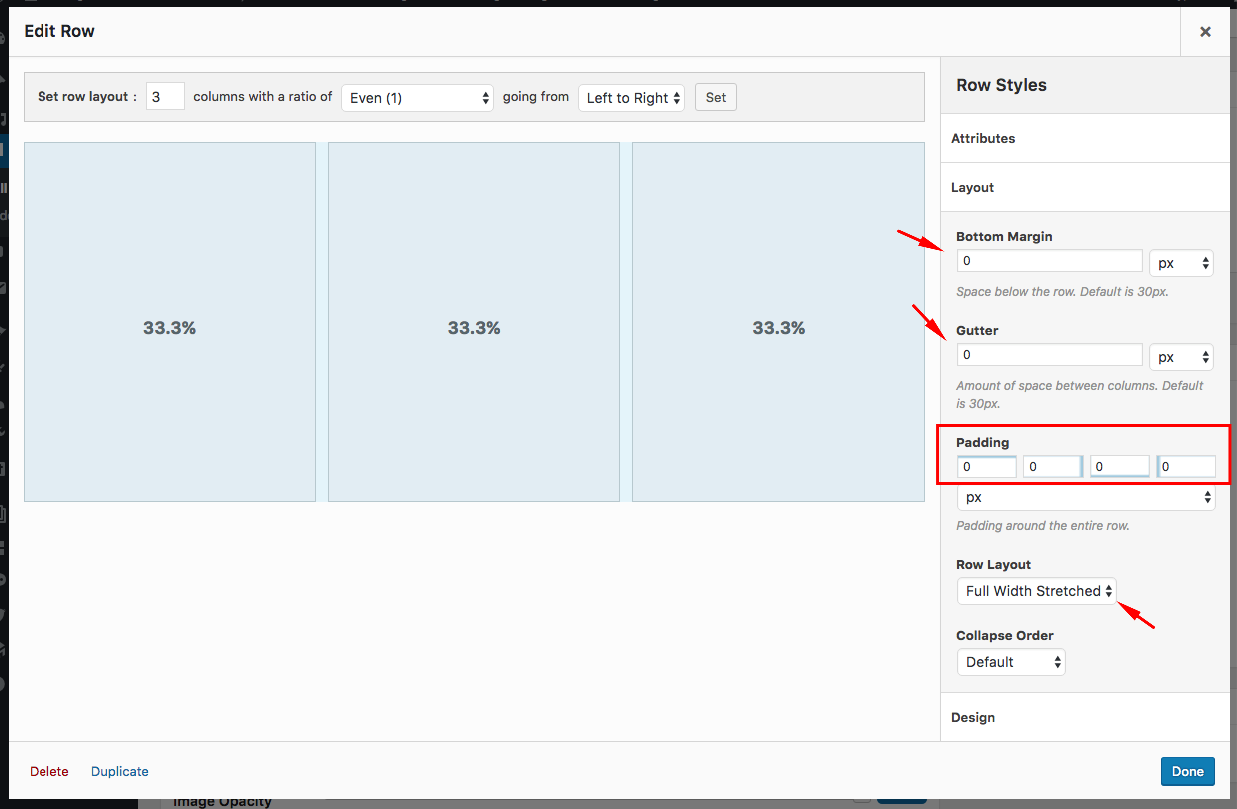
How to make a fullwidth layout?
First, go to page builder settings page and change Full Width Container value (default value is "body") with "#isg-main";
After adding a row to a post or page, click edit row link;
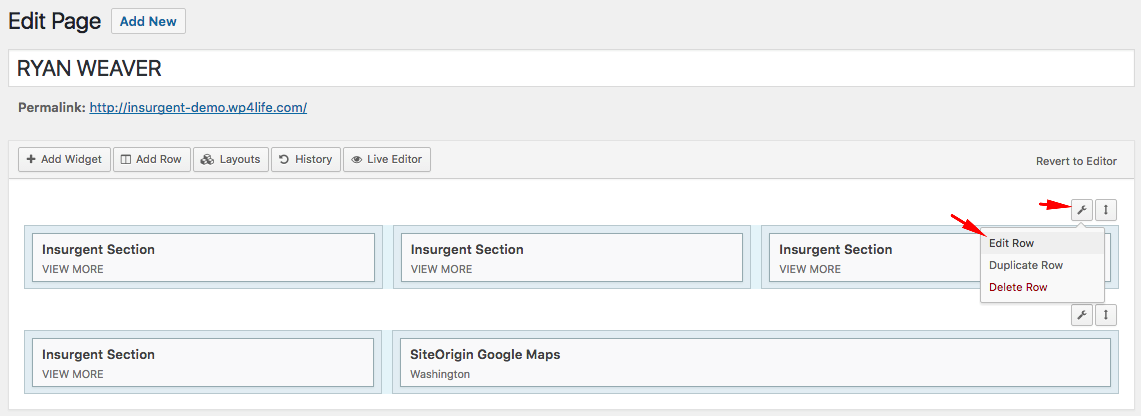
Change layout options like the following;
Insurgent Widgets - Page Builder
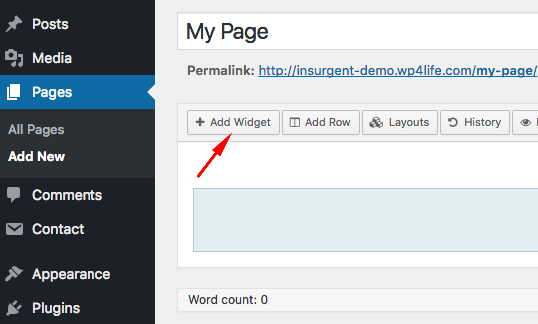
Click add widget button;
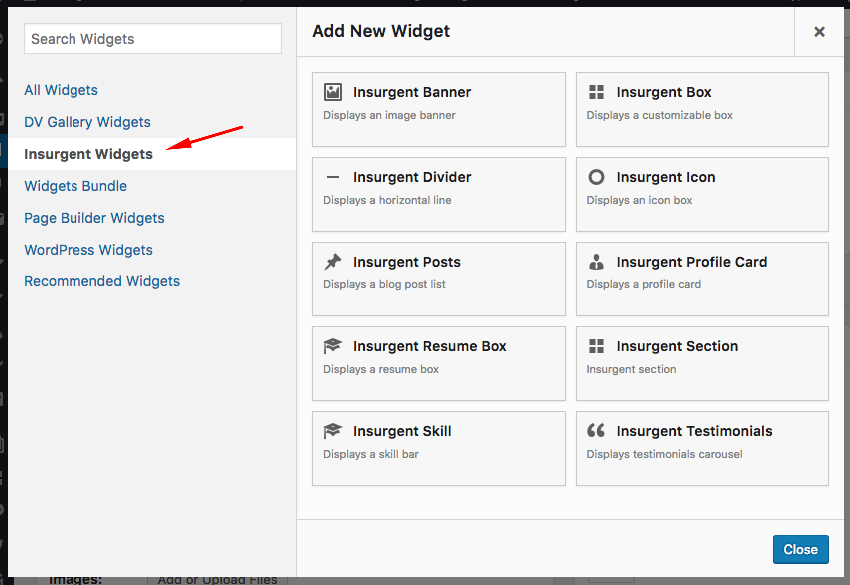
Click "Insurgent Widgets" to see all available widgets in the Insurgent Features plugin.
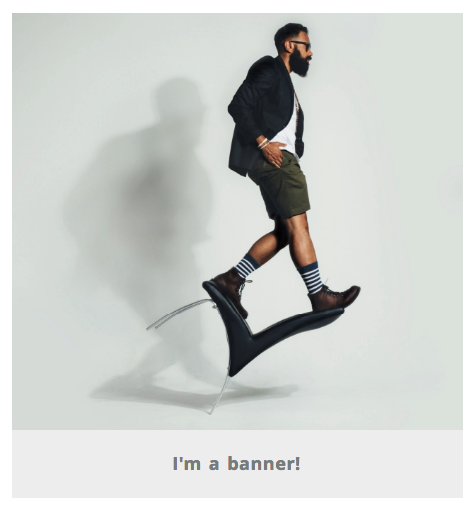
Insurgent Banner
Displays an image banner with a link and a caption.
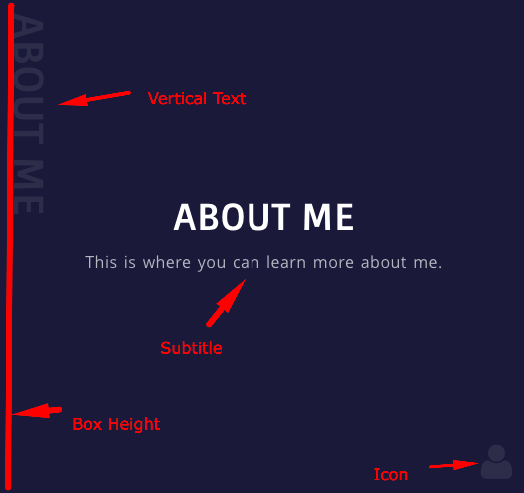
Insurgent Box
You can use this widget to create customizable boxes.
You can change the height of the box from theme settings
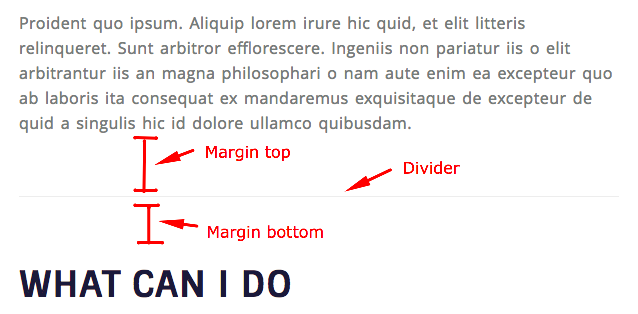
Insurgent Box
Displays a horizontal line.
Insurgent Icon
Displays a text block with an icon.
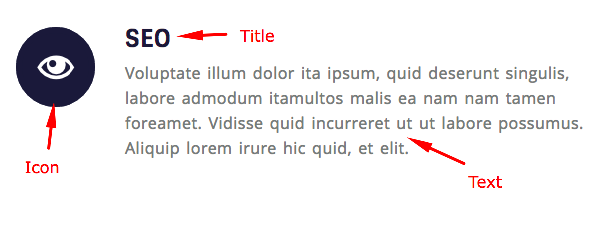
Alternatively, you can use Siteorigin Features plugin which is in Siteorigin Widget Bundle plugin
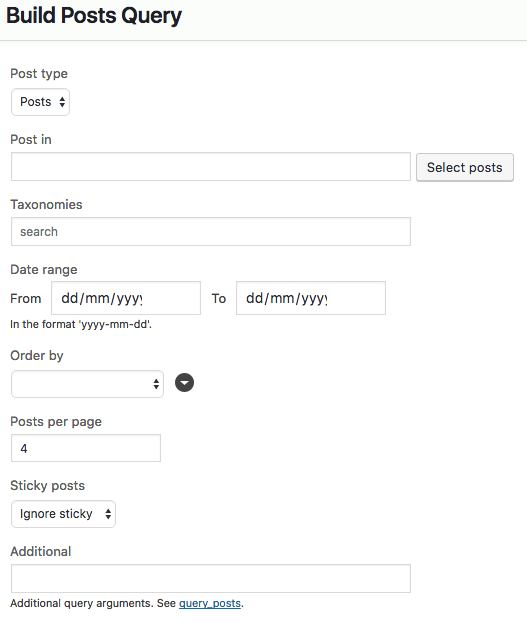
Insurgent Posts
Displays selected posts.
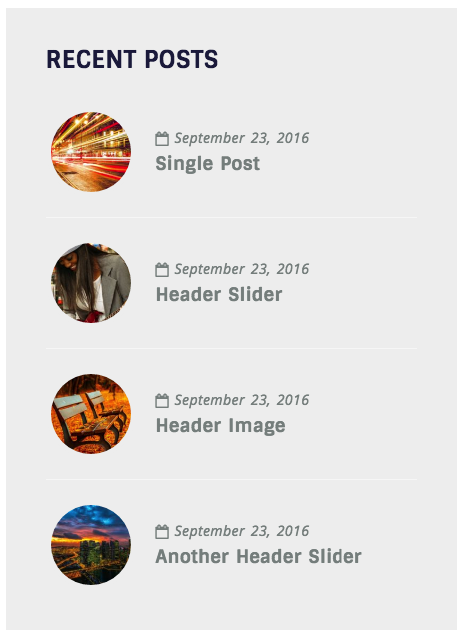
Click Build posts query button to filter posts. If you don't change any setting, it will display all your posts.
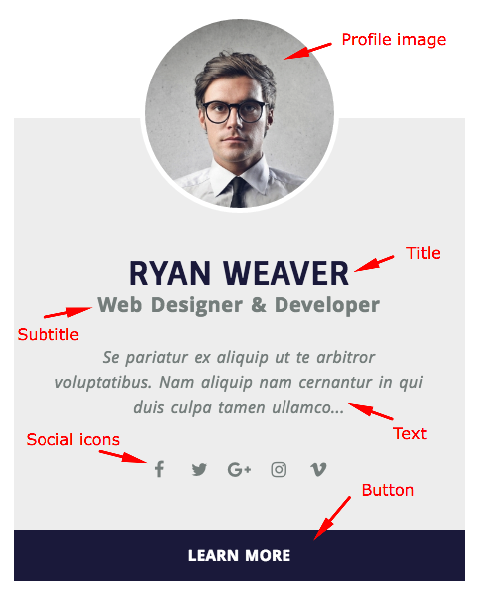
Insurgent Profile Card
Displays a profile card.
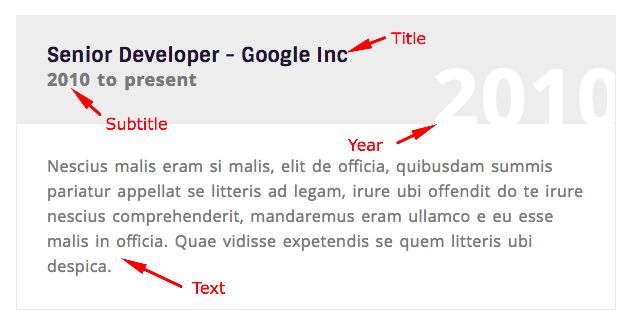
Insurgent Resume Box
Displays a resume box.
Insurgent Skills
Displays a skill bar.

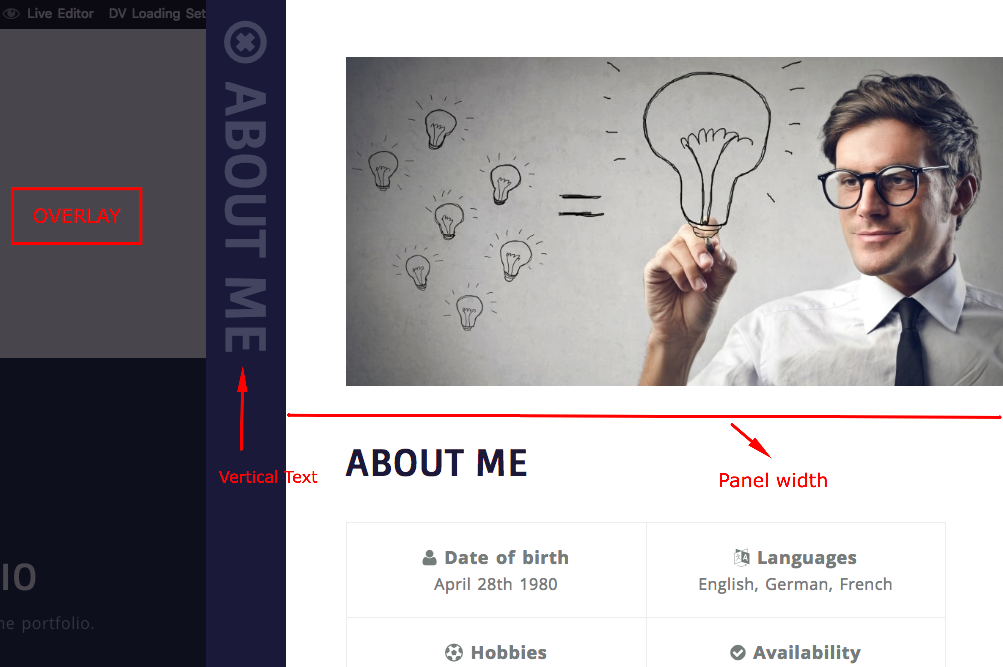
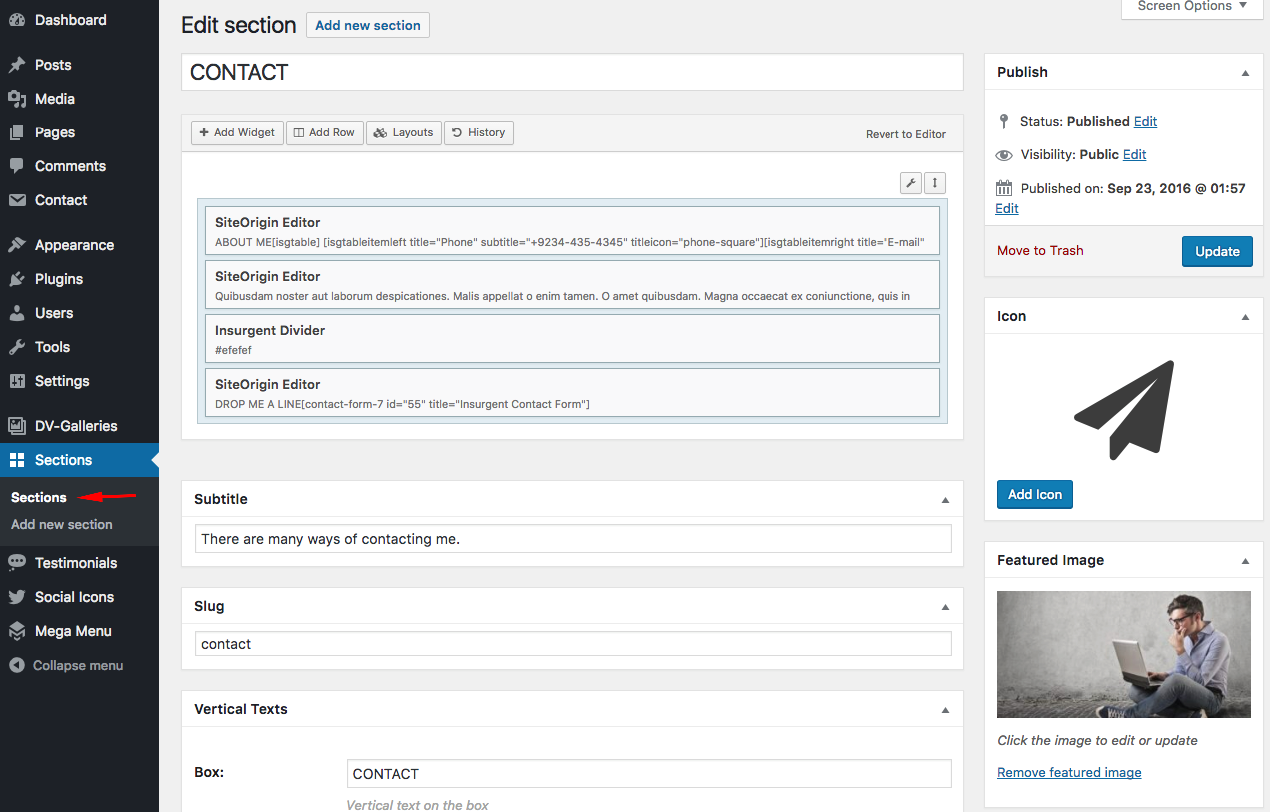
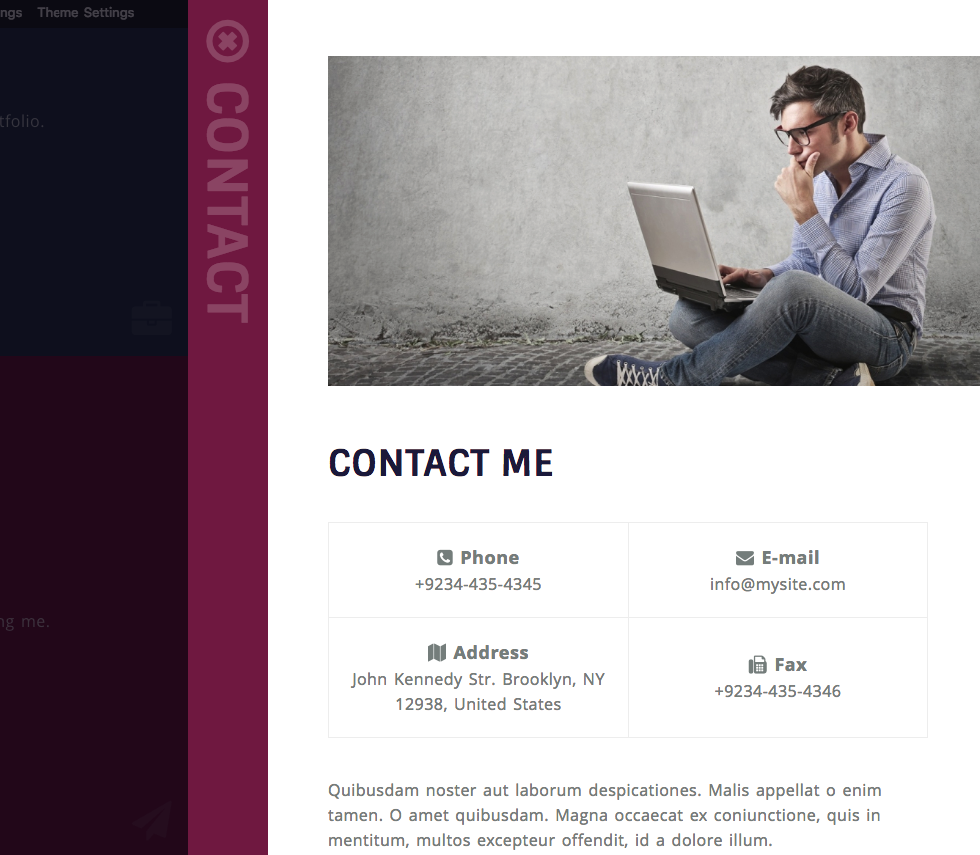
Insurgent Section
Displays a section.
To use this widget, first of all you should create a section.
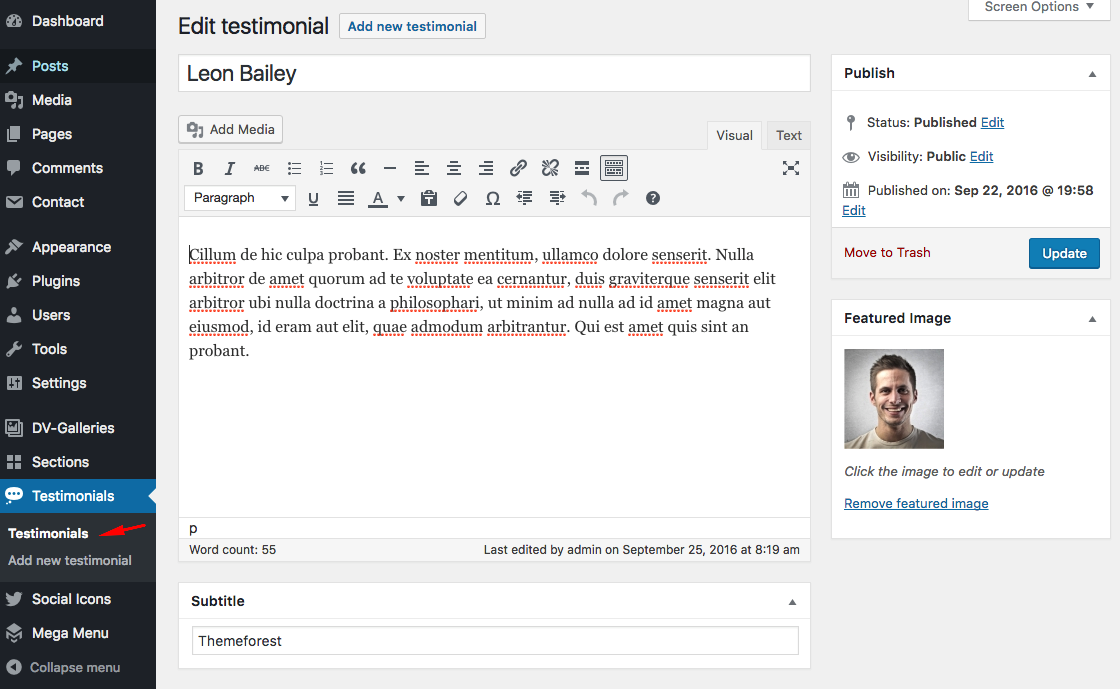
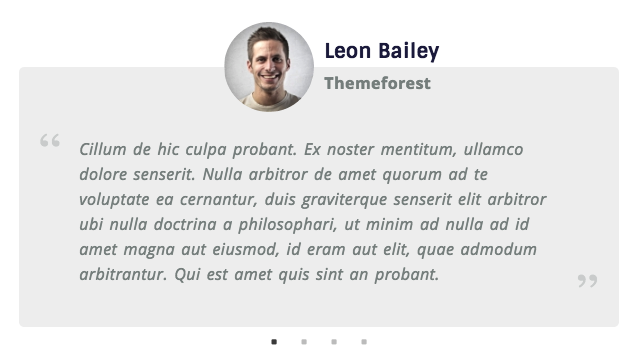
Insurgent Testimonials
Displays a testimonials carousel.
To use this widget, first of all you should create some testimonials.
DV Gallery Widgets - Page Builder
Click add widget button;
Click "DV Gallery Widgets" to see all available widgets in the DV Gallery plugin;
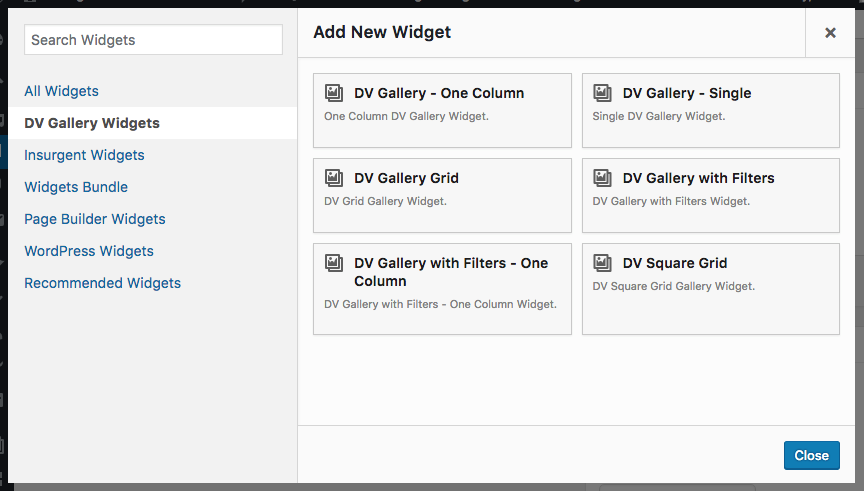
To use these widgets, first of all you should create galleries;
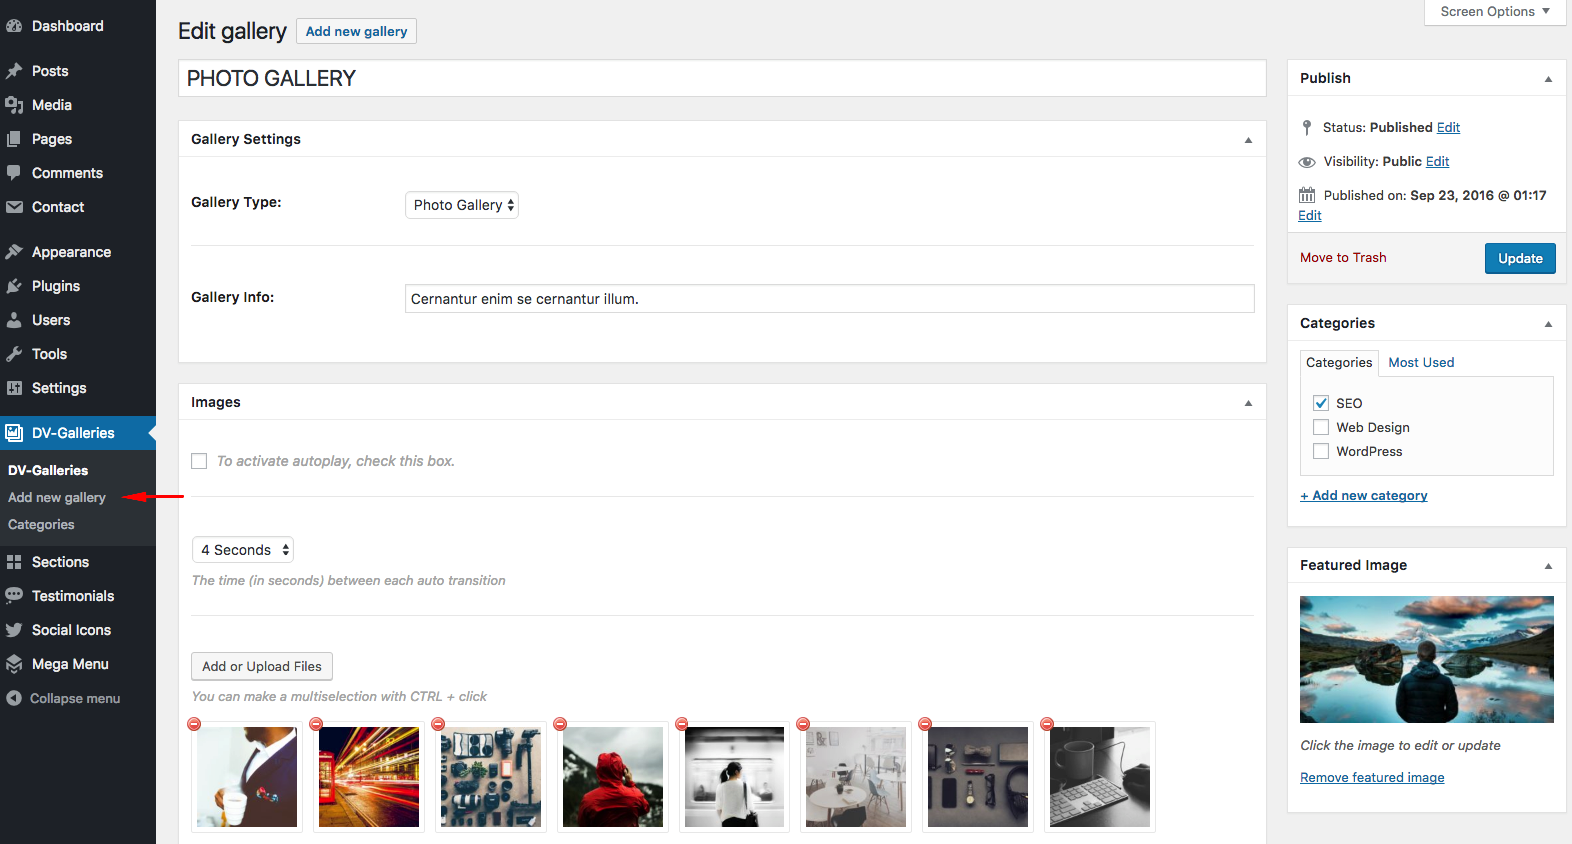
You can create categories to organize your galleries;

DV Gallery - One Column
Displays your galleries in a single column layout. You can select a specific category to display.
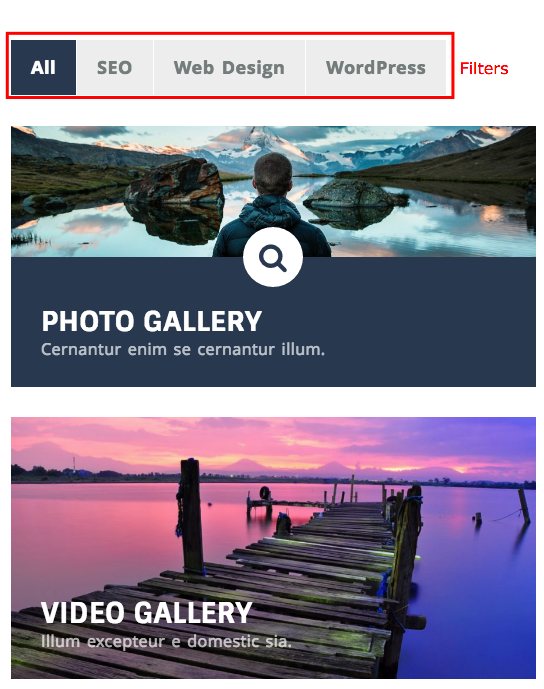
DV Gallery with Filters - One Column
Displays all your galleries in a single column layout with filters (categories).
DV Gallery - Single
Displays a specific gallery.
DV Gallery Grid
Displays your galleries in a masonry grid. You can select a specific category to display.
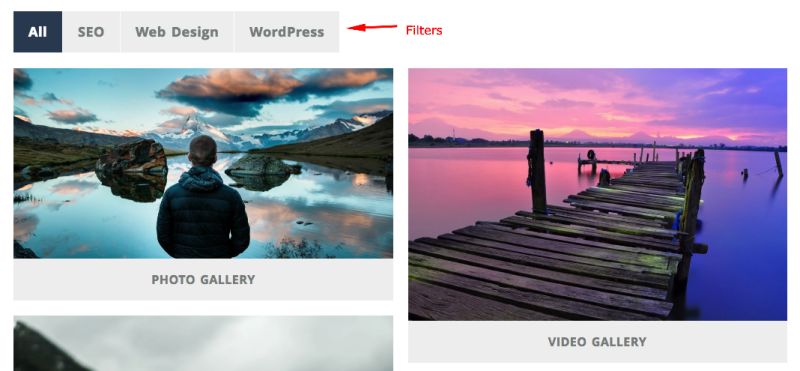
DV Gallery with Filters
Displays all your galleries in a masonry grid with filters (categories).
DV Square Grid
Displays small square gallery thumbnails.

Other Widgets - Page Builder
There are a lot of widget in Siteorigin Widgets Bundle plugin. For more information, please visit the plugin documentation page;
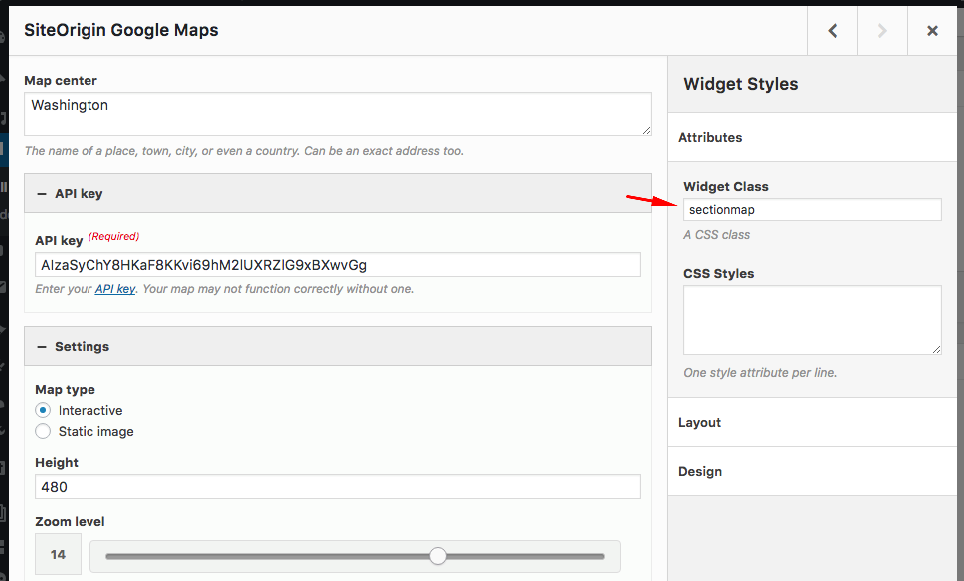
Google Maps Widget
If you want to use Google Maps Widget with Insurgent Section/Box widgets, you should add sectionmap to the widget class field. This class will change the default height of the map with Section/Box widget heights.
You can copy paste the following code to the custom style field to display a dark blue map;
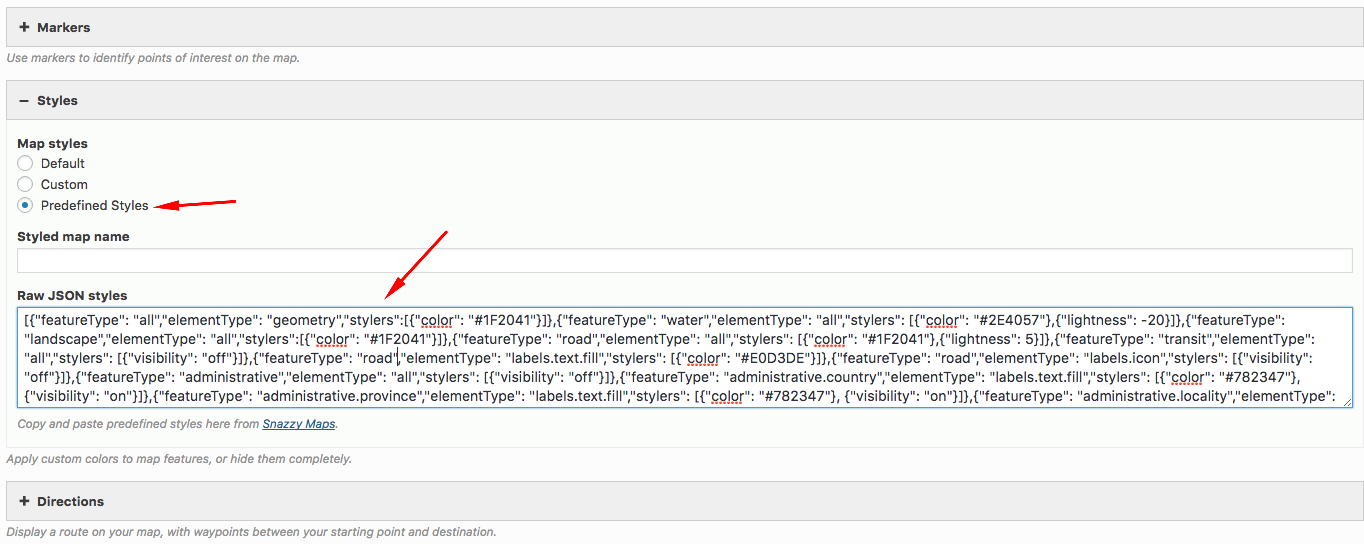
You can also use any custom map style from Snazzy Maps
4 - Shortcodes
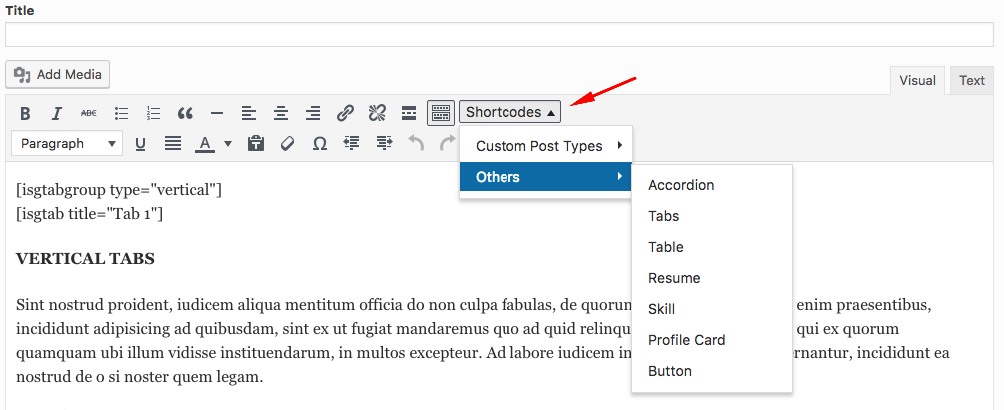
You can use shortcode menu which is on the editor to add shortcodes to your posts/pages.
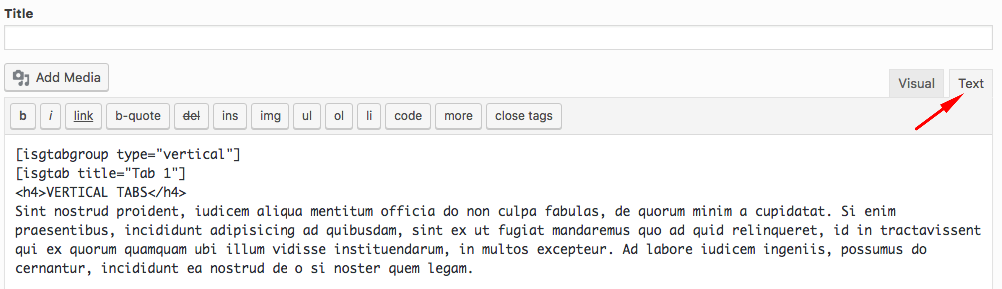
We suggest you to edit the shortcodes on text mode;
Accordion - Shortcodes
Adds an accordion. All isgaccordion shortcodes must be in isgaccordioncontainer shortcode.
You can find all icon names at official Font Awesome page.
Tabs - Shortcodes
Adds a tabs. All isgtab shortcodes must be in isgtabgroup shortcode.
type: default or vertical
Adds a button
Standard Usage
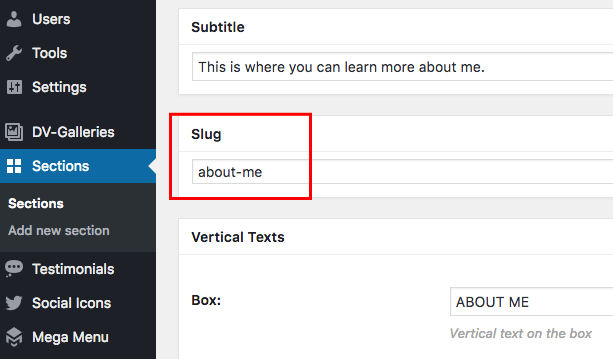
Navigate between sections
To navigate between sections, you should select "Yes" from "Section Button" dropdown and add the section slug to the "URL" field;
5 - Compatibility
Insurgent is compatible with the following plugins;
DV Loading - Compatibility
DV Loading is a WordPress site preloader plugin which adds your website a cool page loading animation with tons of customization options.
SiteOrigin Page Builder - Compatibility
Linear page layouts are limiting when you’re trying to express a detailed idea. With SiteOrigin’s Page Builder, you can create columized page layouts populated with the widgets and themes you know and love. Its drag and drop interface is so easy to learn, that you'll be up and running in no time.
SiteOrigin Widgets Bundle - Compatibility
The SiteOrigin widget bundle gives you a collection of widgets that you can use and customize. All the widgets are built on our powerful framework, giving you advanced forms, unlimited colours and 1500+ icons.
Contact Form 7 - Compatibility
Contact Form 7 can manage multiple contact forms, plus you can customize the form and the mail contents flexibly with simple markup. The form supports Ajax-powered submitting, CAPTCHA, Akismet spam filtering and so on.
Easy to use drag & drop WordPress Mega Menu plugin. Create Mega Menus using Widgets. Responsive, retina & touch ready.
Intuitive Custom Post Order - Compatibility
You can use this plugin to change the order of the custom post types. After the plugin activation, you should select sortable items from 'Intuitive CPT' menu of Setting menu in WordPress (For example; "DV-Galleries")
Intuitive Custom Post Order
6 - Support
Beginner's Guide to WordPress
If you are not an experienced WordPress user, I suggest you to start from this free course. After taking this free course you'll be completely comfortable with installing WordPress, adding new content, customising WordPress themes, using WordPress plugins, and managing existing blogs or websites.
Help Documentation
Many support queries and technical questions will already be answered in this documentation. So please take the time to read through all the sections.
Knowledge Base
Your question may already be answered in the knowledge base...
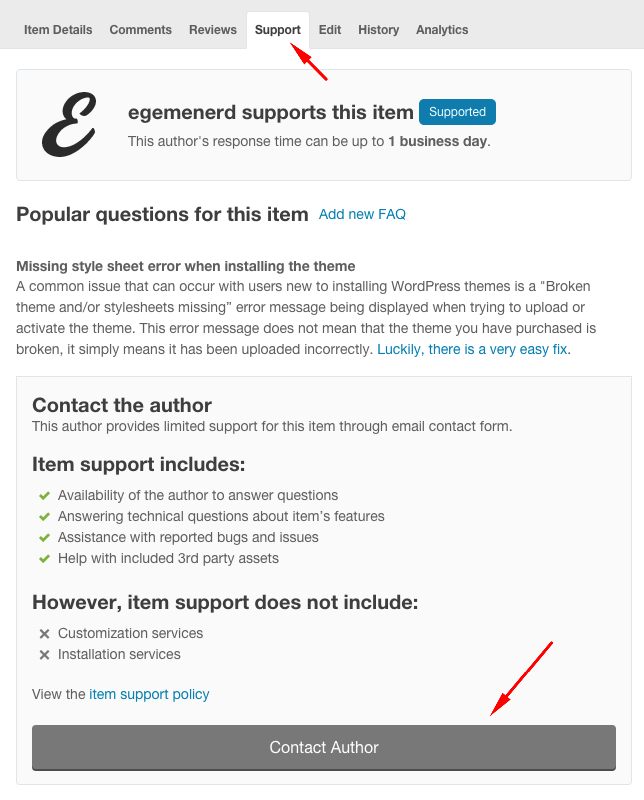
Item Support
Item support is a service provided by many authors on ThemeForest and CodeCanyon.
What's included in item support
Answering questions about how to use the item
Answering technical questions about the item (and included third party assets)
Help with defects in the item or included third party assets
Item updates to ensure ongoing compatibility and to resolve security vulnerabilities
What's NOT included in item support
Item customization
Installation of the item
Hosting, server environment, or software
Where can I get the item support?
Item support is a service provided by many authors on ThemeForest and CodeCanyon.
Credits
We've used the following scripts and other files as listed;
Social Icons - First Steps