Help Documentation
Vets Wordpress Theme
Thank you for purchasing our theme ! Please take the time to read through the following sections before asking for support. As many support related questions can be answered simply by re-reading the documentation.
 Envato
 Facebook
 Behance
First Steps
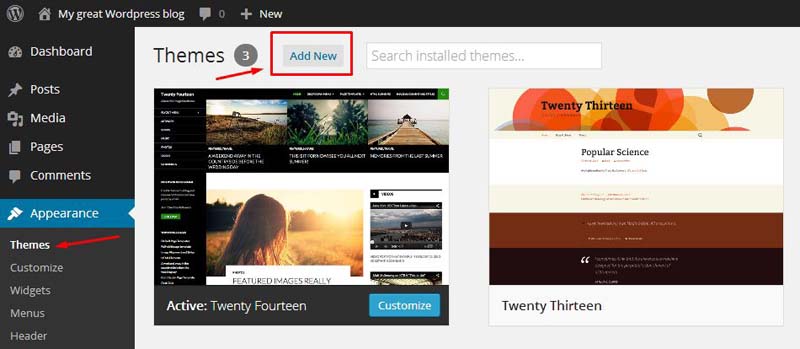
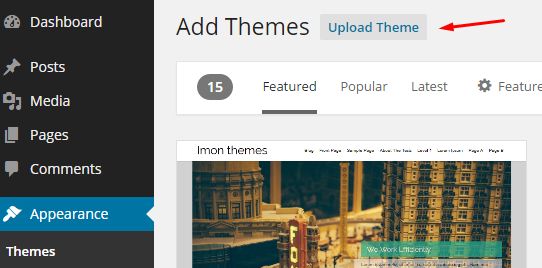
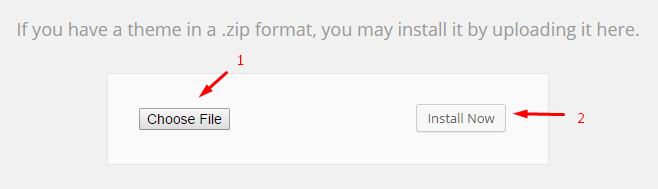
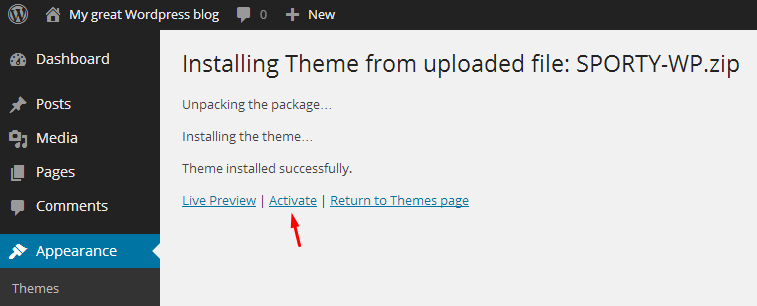
Installation
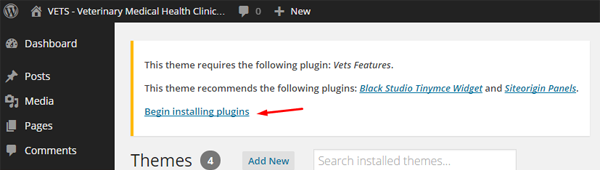
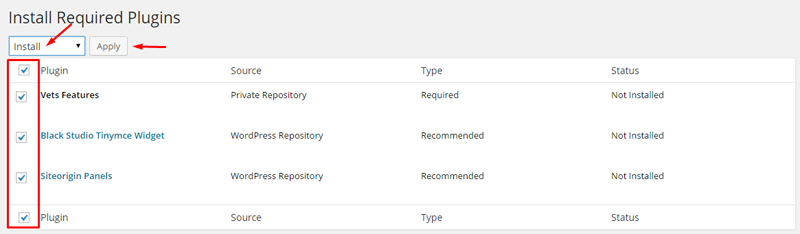
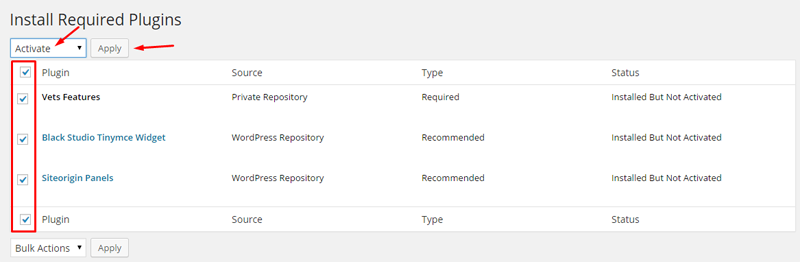
If you want to use all features of VETS (Custom post types,shortcodes,widgets,page builder...etc), you should upload and activate all required plugins. After the installation of the theme, you will see a message about required plugins. Click "Begin Installing Plugins", install the plugins and activate them.
Note: You can also find these plugins in the main theme folder in "plugins" folder.

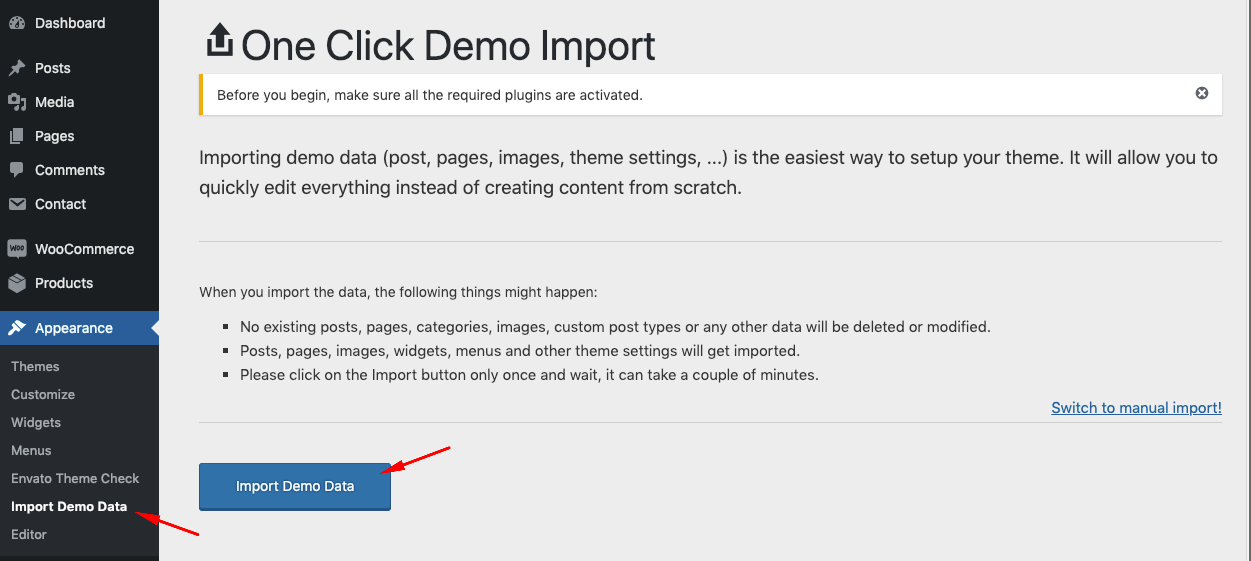
Loading Demo Content - First Steps
Go to Appearance->Import Demo Data and click on the Import button only once and wait, it can take a couple of minutes.
Creating Front Page & Blog Page
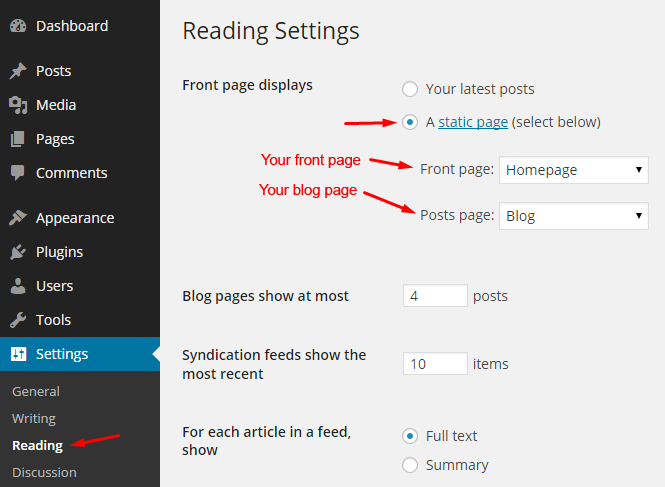
First of all, you should create a new page (select a homepage template) for your frontpage display.
Go to Settings->Reading and select in the drop-down box this page for the front page display.
To create a blog page, create a blank page.
Go to Settings->Reading and select in the drop-down box the name of the Page that will now contain your latest posts.
Creating Menu
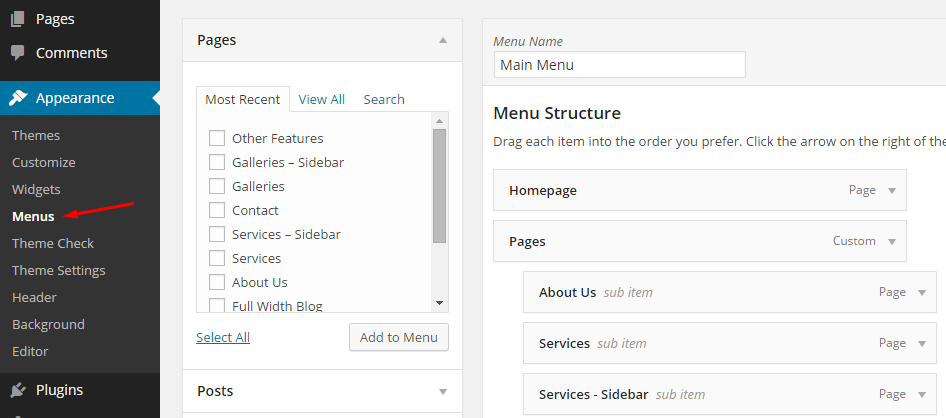
You can create a menu from Appearance->Menus.
After creating the menu, you should manage your menu location (Main menu).

Adding Logo
You can upload your logo from Appearance->Customize->Header Image.
Background
You can change background color from Appearance->Customize->Colors.
You can add background image from Appearance->Customize->Background Image.
Home Slider
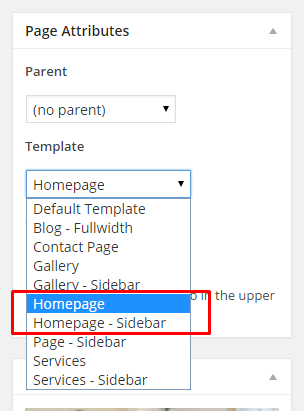
To use home slider, you should create a page and select a Homepage page template.
For more information about page templates, click here...
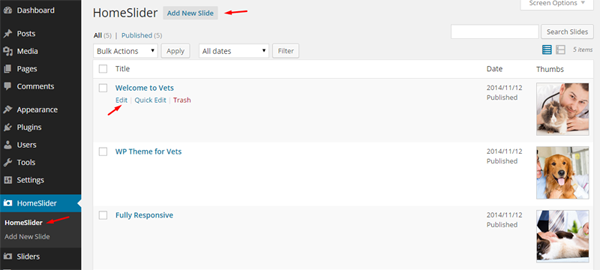
You should add each slide one by one. Recommended image size is 1200x460 px. If you upload a bigger image than this size, it will automatically cropped.
If you want to use Caroufredsel, you should upload minimum 4 images.
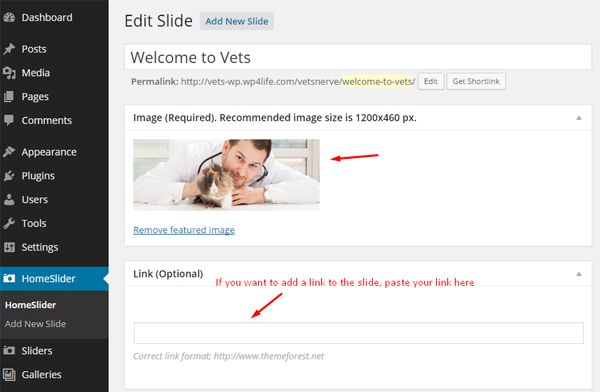
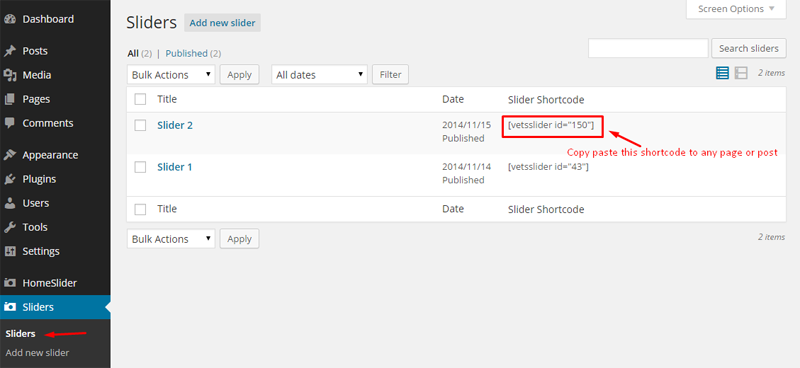
Sliders
You can create as many slider as you want and you can add these sliders to any page or post with vetslider shortcode.
To add the slider to a page or post, simply copy paste the slider shortcode to them. You can find slider shortcodes on sliders admin page.
You can also use slider widget to add sliders to your pages.For more information, please look at the page builder section.

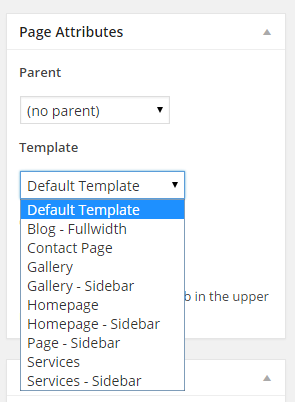
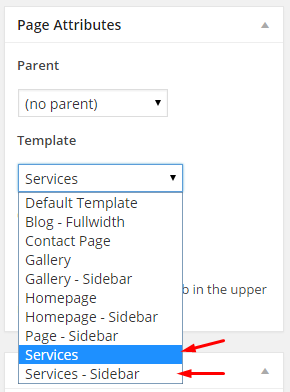
Page Templates
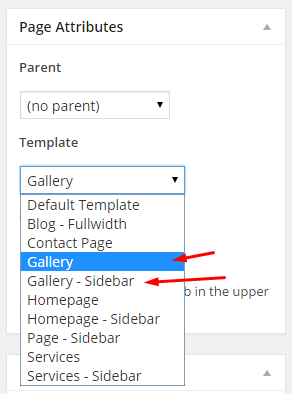
There are 13 page template in Vets-WP. You can select any of them during adding new page/editing page.
Default page template is a full width standard page template.
You can use Blog-Fullwidth page template to display all your posts in a full width page.
There is a Google map field on contact page template. You can set up your Google Map from Appearance->Contact.
Gallery and Gallery-Sidebar templates display your galleries.For more information please look at the following section
To use Nerveslider, you should select "Homepage" or "Homepage-Sidebar" Template.
To use Caroufredsel, you should select "Homepage Caroufredsel" or "Homepage Caroufredsel - Sidebar".
You should add minimum 4 image to the slider for the Caroufredsel.
You can use Page-Sidebar page template to create a page with a sidebar.
Services and Services-Sidebar templates display your services.For more information please look at the following section
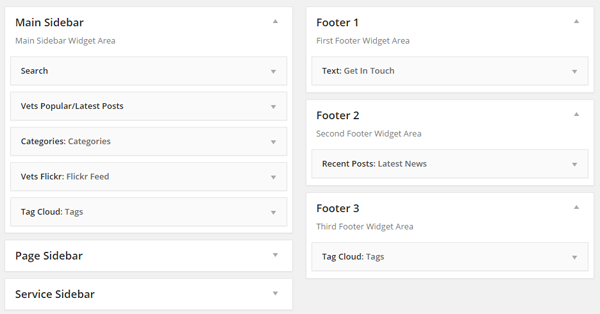
Sidebars
There are 3 sidebar and 3 footer widget field in Vets-WP ( Appearance->Widgets ). You can add your widgets to these fields.
Main Sidebar: This sidebar is displayed on all standard wordpress blog pages like blog,archive,search,category etc.
Page Sidebar: This sidebar is displayed on Homepage-sidebar and Page-sidebar templates.
Service Sidebar: This sidebar is displayed on Services, Services-Sidebar page templates and on single service pages.
Footer widget fields: You can use these fields to add widgets to the footer.
Theme Settings
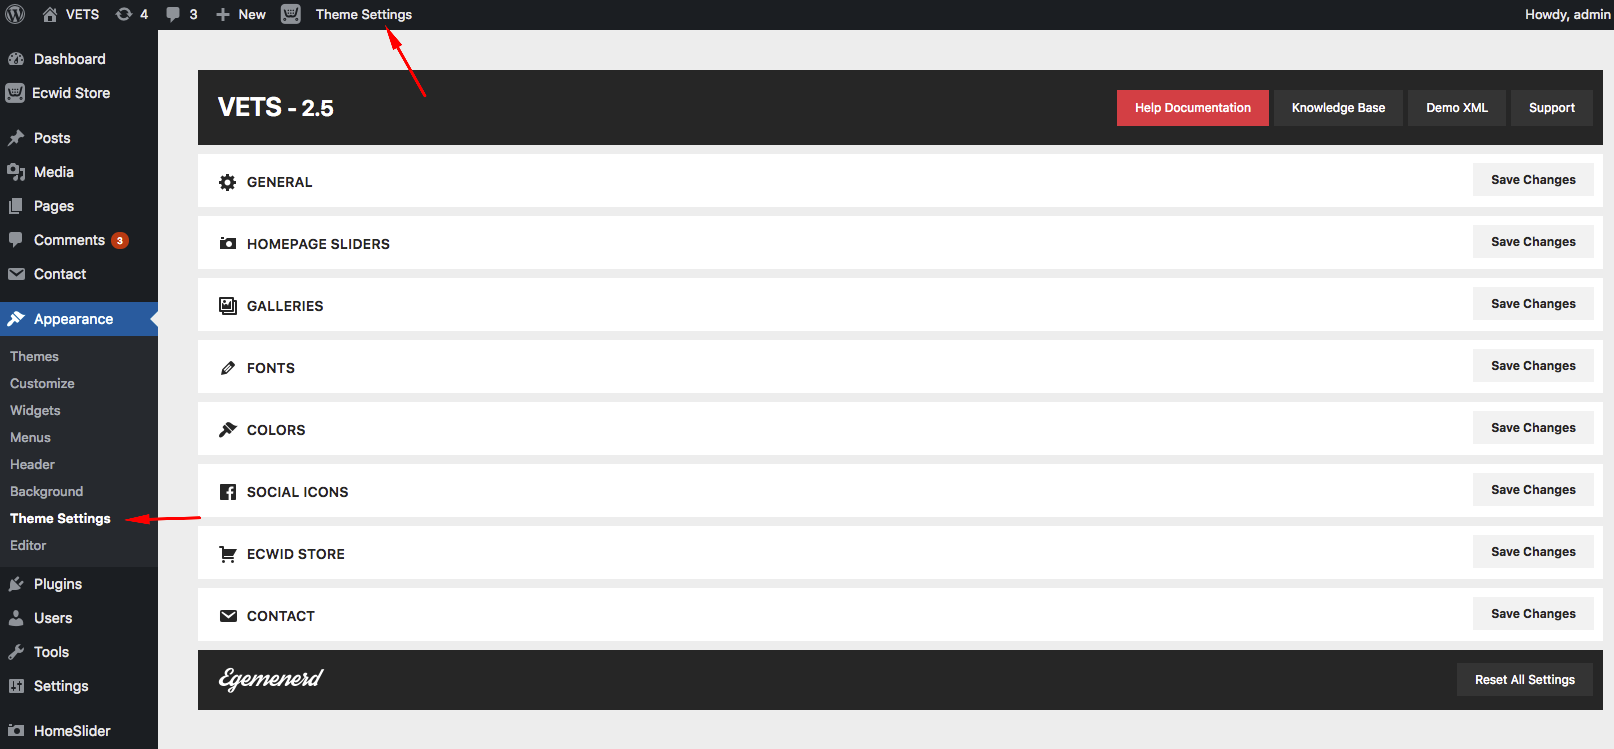
General
Custom CSS: You can use this field to add your own css codes.
Dropdown menu width: You can change your dropdown menu width. It may be useful if your menu titles are too long.
Blog Image: This image will be displayed on standard wordpress blog,archive,search etc. pages as a featured image.
Use Blog Image On All Single Posts: To use blog image as featured image on all single post pages, check this box.
Loading image (64x64 px): You can upload your own loading image.
Remove Meta Data: If you want to remove meta data (Author name, categories, tags) from single post pages, check this box.
Gallery per page: Gallery page templates will show at most this number of posts. If you don't want to see pager on these pages, use a bigger number like 99.
Service per page: Service page templates will show at most this number of posts. If you don't want to see pager on these pages, use a bigger number like 99.
Remove Social Sharing Buttons: There are social sharing buttons at the bottom of the single posts and services. To remove it, switch on.
Hide Footer Widget Area: If you don't want to use footer widgets, check this box.
Footer Text: If you don't need to add a copyright message to your website, leave this field blank.
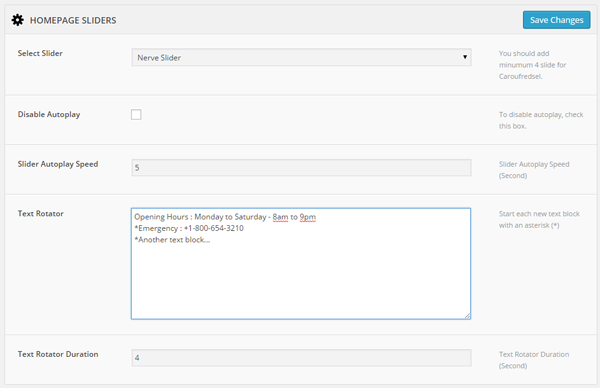
Homepage Sliders
Disable Autoplay: To disable autoplay, check this box.
Slider Autoplay Speed: Slider Autoplay Speed (Second).
Text Rotator: There is a text rotator at the bottom of the home sliders. You can use this field for your announcements, working hours etc. You should start each new text block with an asterisk (*).
Text Rotator Duration: Text Rotator Duration (Second).
Galleries
This section contains the settings of the popup galleries.
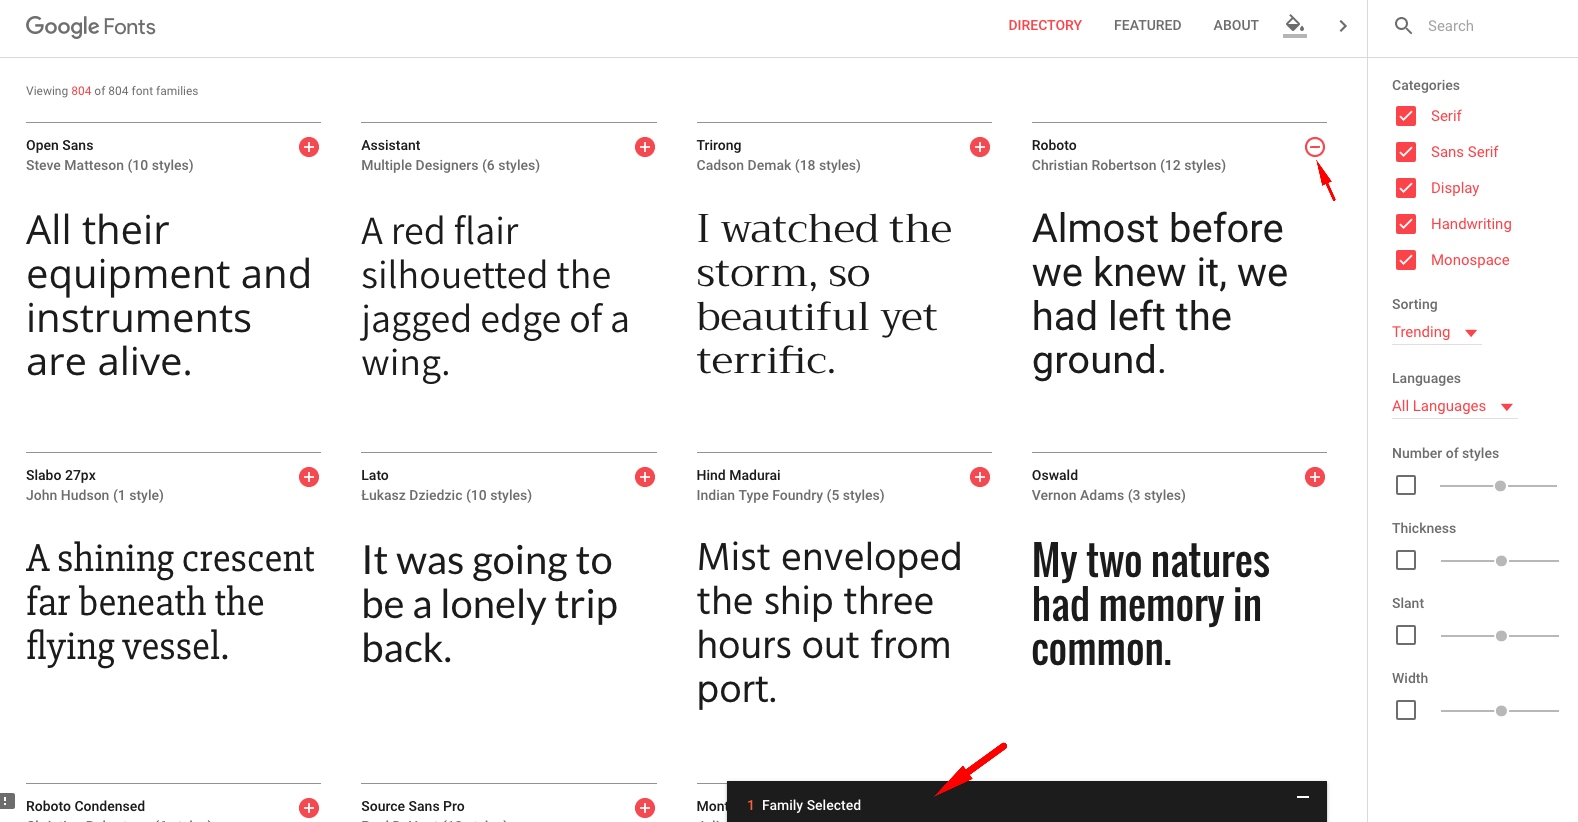
Fonts
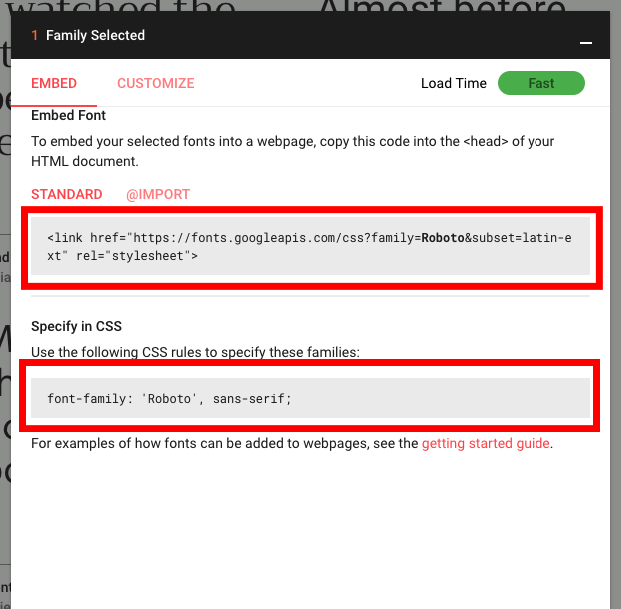
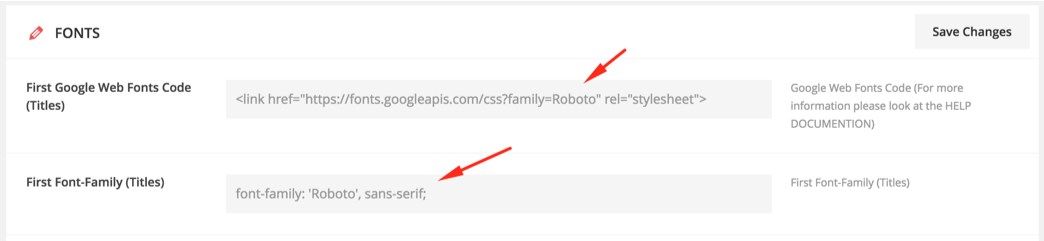
Vets supports Google Web Fonts. To change default fonts, please follow the following steps;
Choose a font and click "plus" button on the top right corder of the font. After that copy the codes (like on the screenshots) and paste them to the fields on the theme settings page.
You can also change font sizes on this section.
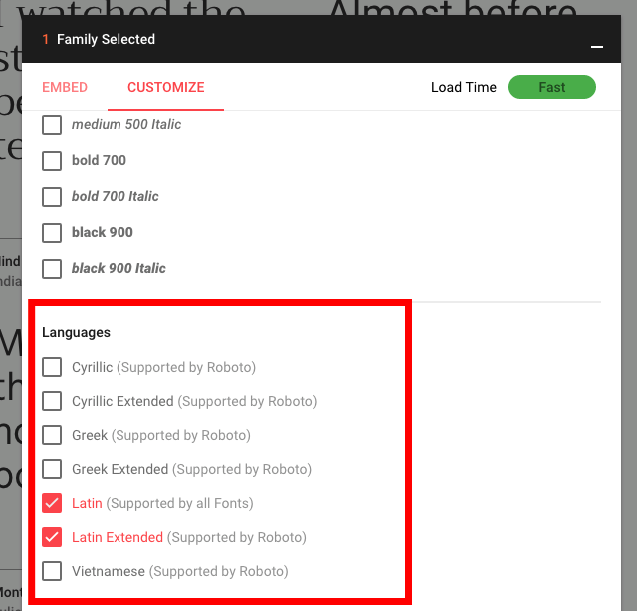
Don't forget to check "customize" tab. You may need to check some boxes on this section.
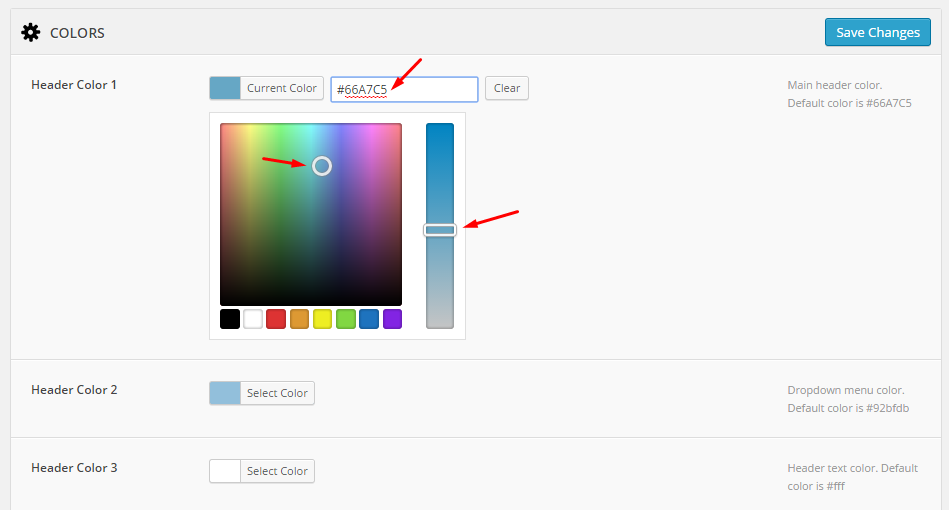
Colors
You can change all colors of the theme easily with colorpickers.
Social Icons
You can add your social networks links to your website here. These icons will be displayed at the bottom of your pages.
If you can't find your social network name in the list, you can upload your own icon from "custom icon image" fields. You can add maximum 3 custom icon.
Ecwid Store
To use Vets custom Ecwid css theme, you should activate it from this section. If you want to use a standard Ecwid css theme or if you want to make your own css theme, don't activate it.

For more information about Ecwid, click here
Contact
You can set up Google Map which is on the contact page template here.
Find your coordinates Click here...
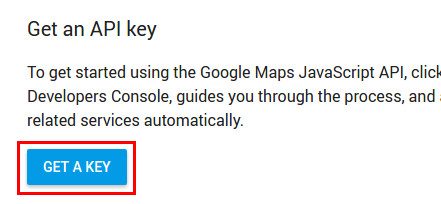
How to Get an API Key
1. Follow this link and click on Get a key:
2. Agree with the service Terms of Service:
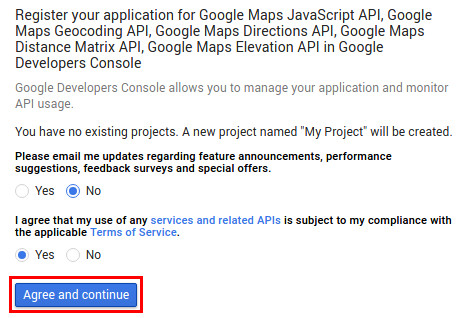
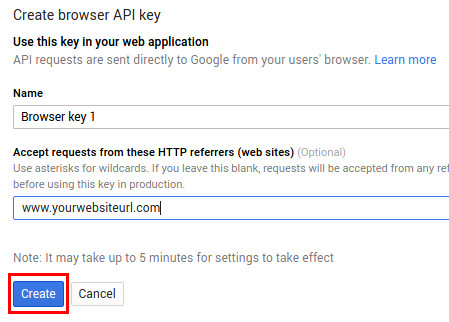
3. Choose a name for your new key and specify the websites on which the key usage will be allowed. If you don’t need any website restriction, just put an * in that field (but don’t leave it blank, unless you are having issues with *! See comments for further information). Then click on Create:
4. Copy paste the key to the theme settings
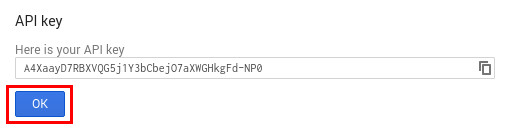

5. Your API key should be up and running within 5 minutes.
To use contact form shortcode, you should fill the following fields.
Recipient Name: Recipient Name of the contact form e-mail.
E-Mail Subject: Subject of the contact form e-mail.
Contact Form E-Mail: Contact form content will be send to this email address.
Name Field Text: Name Field Text.
E-Mail Field Text: E-Mail Field Text.
Message Field Text: Message Field Text.
Send Button Text: Send Button Text.
If you want to use contact form without any problem, you should fill all these fields. If your contact form isn't working, there should be a problem on your server. Please contact your hosting provider.
You can also use Contact Form 7 plugin to create custom forms. Contact Form 7 is fully compatible with Vets.
Galleries
Create a galleries page
To display your galleries, you need to create a blank page and select a gallery page template. Your galleries will be displayed on this page.
Creating galleries
To create a new gallery, click Add new gallery link.
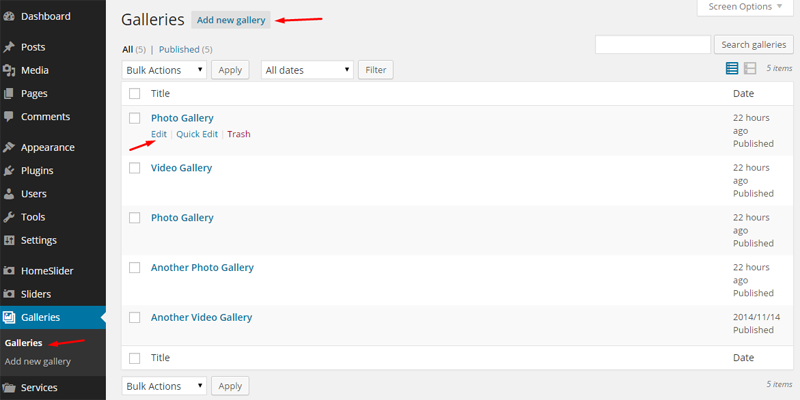
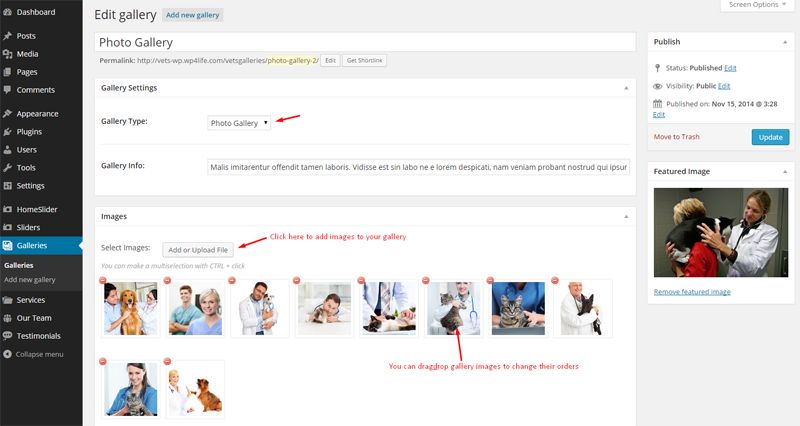
Photo Gallery
To create a photo gallery, select Photo Gallery option. You can add a gallery info. It will be displayed like a post excerpt. You can also add a featured image to your gallery. These fields are optional.
To add/upload your gallery images, click "Add or Upload File" button. You can make a multiselection with CTRL+click. After adding images you can drag-drop your gallery image thumbnails to change their orders.
If you uploaded demo xml file, you should edit your photo galleries and add your own gallery images.
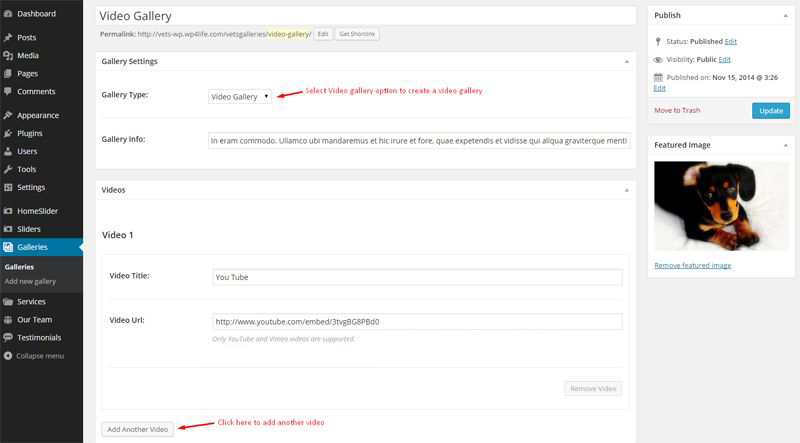
Video Gallery
To create a video gallery, select Video Gallery option. You can add a gallery info. It will be displayed like a post excerpt. You can also add a featured image to your gallery. These fields are optional.
Video gallery supports only You Tube and Vimeo videos.
To add a new video, you should click "Add Another Video" button.
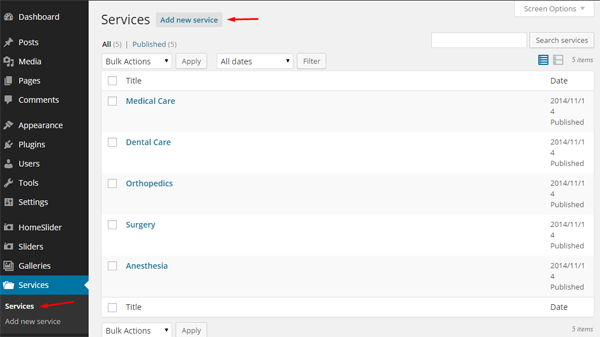
Services
Display Services
1) To display your services, you can create a blank page and select a services page template. Your services will be displayed on this page.
2) You can use widgets to add your services to any page. For more information, please look at the page builder section.
3) You can use shortcodes to add your services to any page. For more information, please look at the shortcodes section.
Adding Services
To create a new service, click Add new service link.
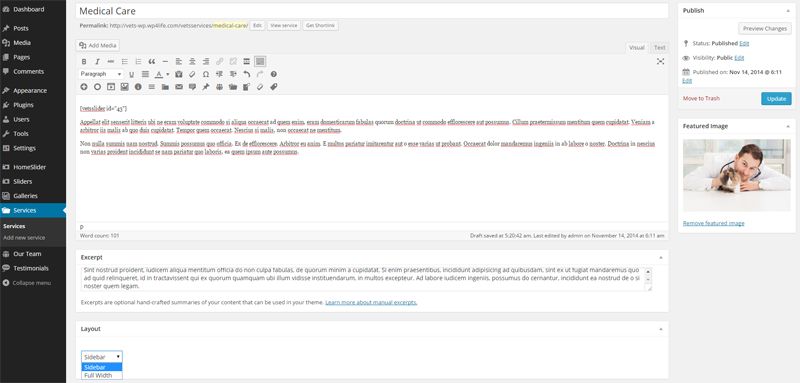
You can add any content to service page like all other wordpress posts with a text editor.
Excerpt is optional hand-crafted summary of your service.
There are two layout option for the service page (Sidebar and Full width).
Featured Image: Featured images will be displayed on services tabs and on your services pages.
Header Image: Header images will be displayed only on single service pages.
Our Team
Display Team
1) You can use widgets to add your team to any page. For more information, please look at the page builder section.
2) You can use shortcodes to add your team to any page. For more information, please look at the shortcodes section.
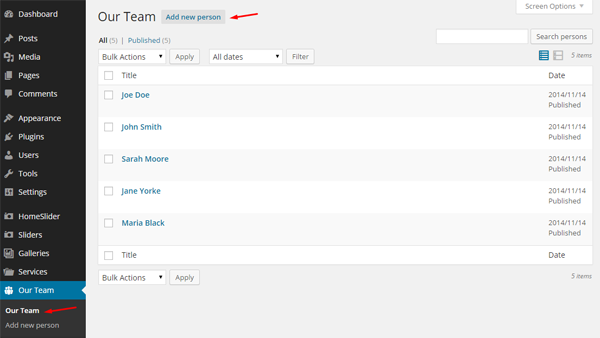
Adding Team Members
To create a person, click Add new person link.
You can add any content to a person page like all other wordpress posts with a text editor.
You can add a featured image. I suggest you to use a high resolution image.
Other Fields
Person Image: This image is used on our team carousel and on single vet page on the left side.
Person Info: Additional person information field.
List Box: To activate list box, first of all check "Add List Box" box. You can add as many list item as you want. These items will be displayed under the person image on the single vet page.
Social Icons: To activate social icons, first of all check "Add social Icons" box. You can add as many social icon as you want. These items will be displayed under the list box on the single vet page. If you don't see your social network icon in the list, you can upload your custom icon (32x32 px).
Testimonials
Display Testimonials
1) You can use widgets to add your testimonials to any page. For more information, please look at the page builder section.
2) You can use shortcodes to add your testimonials to any page. For more information, please look at the shortcodes section.
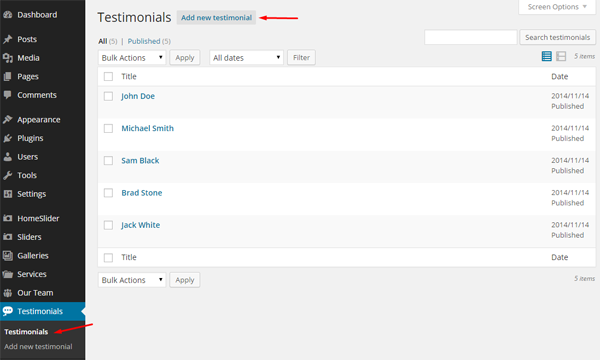
Adding Testimonials
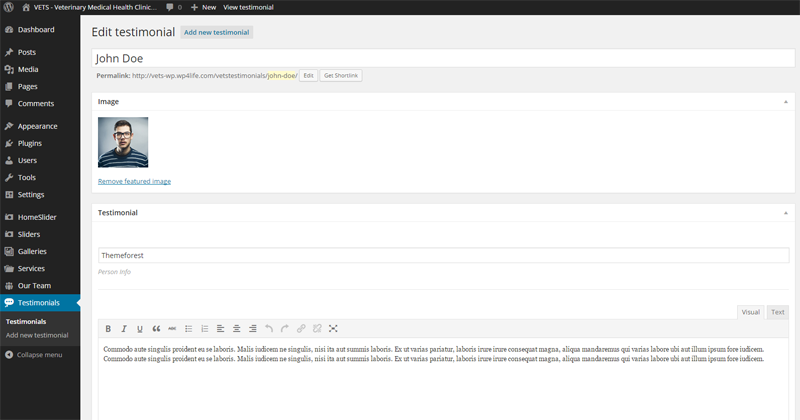
To create a testimonial, click Add new testimonial link.
You can add any content to testimonial field.
Person info is displayed under the person name.
You can also add image of the person to the testimonial.
Shortcodes
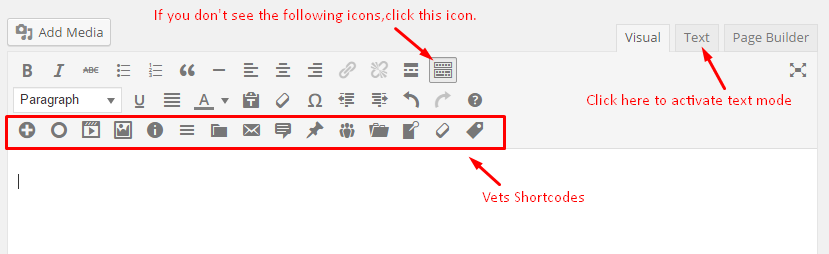
You can use editor icons to add shortcodes to the pages. Most of them available as widgets. So I suggest you to upload page builder plugin and use widgets instead of shortcodes. For more information, please look at the page builder section.
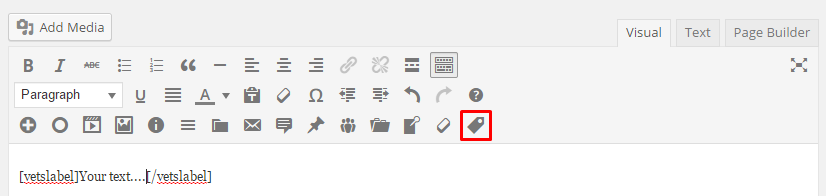
I recommend you to use "Text" mode of the text editor during editing shortcodes.
Vets Icons
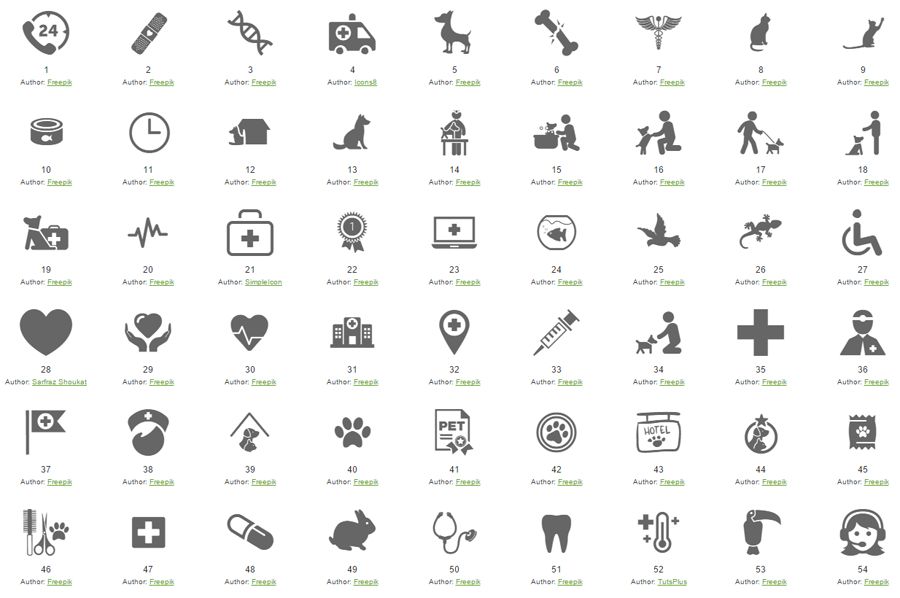
You can add vets icons to any page.
There are 54 available icons. You can use any of them with adding its number into the iconid attribute.
You can add icon title into title attribute.
If you want to add a link to the icon you can use url attribute.
You can add icon text into the shortcode like on the screenshot.

Custom Icons
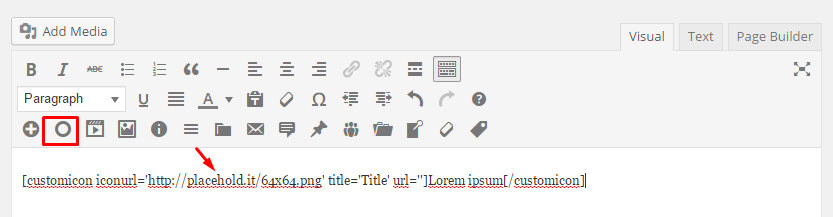
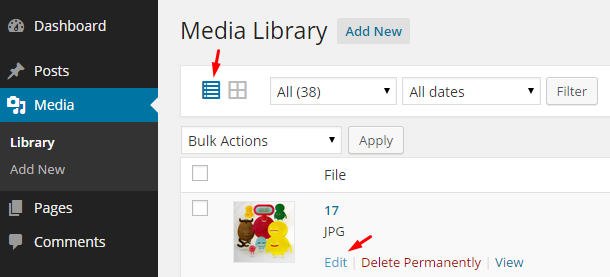
You can add your custom icons to any page.
You can use Wordpress media library to upload your own icons. Then you can find its link at media edit page.
You can add icon title into title attribute.
If you want to add a link to the icon you can use url attribute.
You can add icon text into the shortcode like on the screenshot.

Iframe
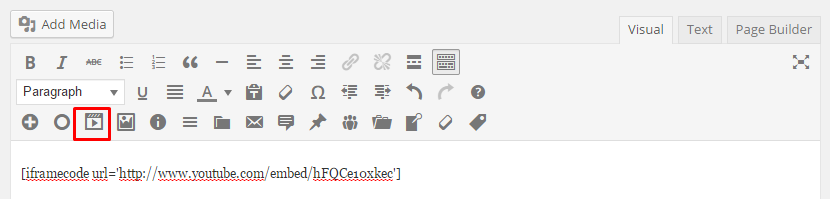
You can add a embed responsive iframe/video with this shortcode easily.
You should use embed iframe links to use this shortcode. Page links don't work.
This is true; [iframecode url='http://www.youtube.com/embed/hFQCe10xkec']
This is wrong; [iframecode url='http://www.youtube.com/watch?v=hFQCe10xkec']
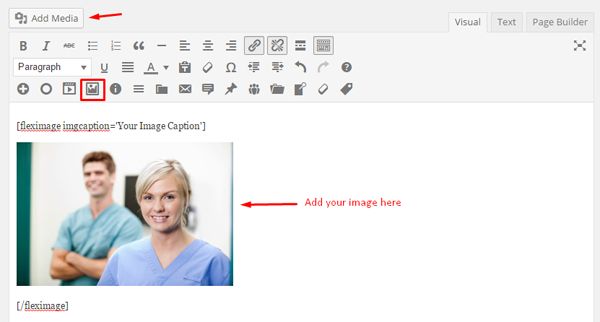
Flex Image
You can add a responsive image with a caption with this shortcode. After adding the shortcode use "Add Media" button to add an image into the shortcode.
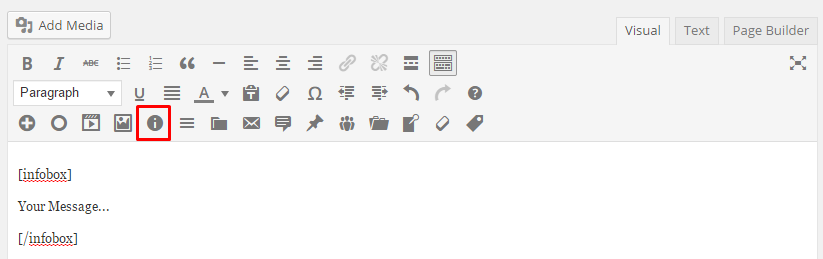
Info Box
You can use info boxes for notices,warnings etc. Just add your text into the shortcode.
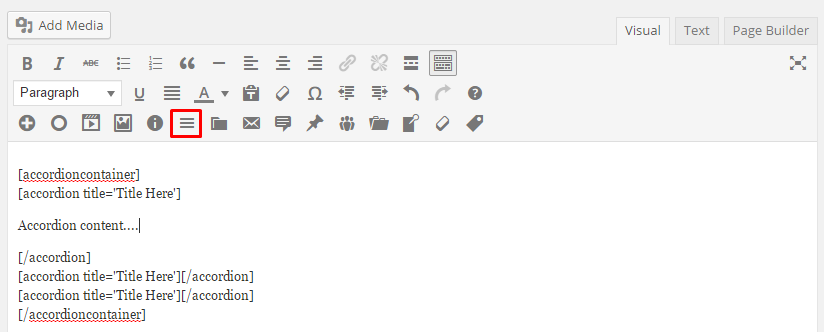
Accordion
You can add an accordion to any page with this shortcode.
"accordion" shortcodes must be in the "accordioncontainer" shortcode.
You can use title attribute of the accordion shortcode to add title and you can add the other text into the accordion shortcode.
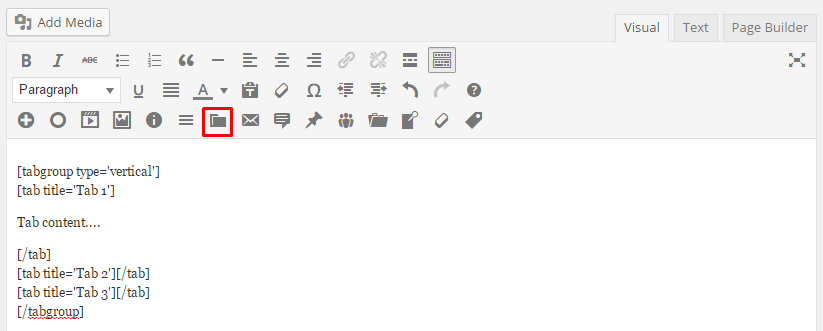
Tabs
There are 3 types: vertical , horizontal , accordion
You can add title to each tab with using tab title attribute and you can add the other text into the tab shortcode.
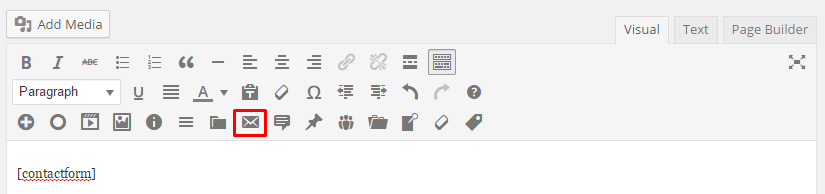
Contact Form
You can add a contact form to any page with this shortcode. Form settings are at Appearance->Theme Settings->Contact.
Testimonials
You can use this shortcode to add your testimonials to any page.
autoplay: true or false
duration: Duration of autoplay (seconds). You can use only numbers (1,2,3,4 etc.).

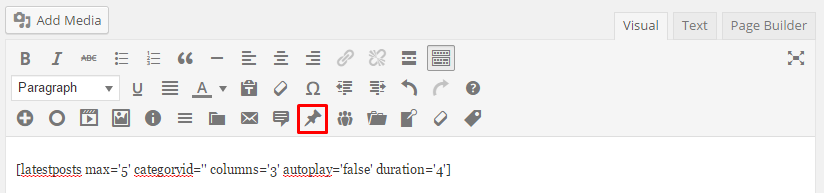
Latest Posts
You can use this shortcode to add latest posts carousel to any page.
max: Maximum number of posts.
categoryid: If you want to display posts from only a specific category, you can use this attribute. You can find your category ids at the categories page.
columns: Number of visible columns. You can use 1, 2, 3 or 4.
autoplay: true or false
duration: duration of autoplay (seconds). You can use only numbers (1,2,3,4 etc.).

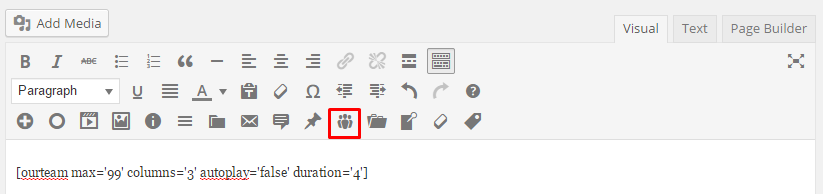
Our Team
You can use this shortcode to add our team carousel to any page.
max: Maximum number of team members.
columns: Number of visible columns. You can use 1, 2, 3 or 4.
autoplay: true or false
duration: Duration of autoplay (seconds). You can use only numbers (1,2,3,4 etc.).
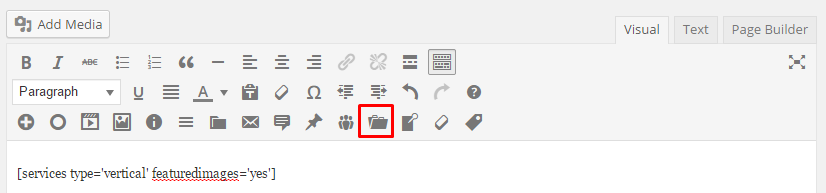
Services
You can use this shortcode to add services tabs to any page.
There are 3 types: vertical , horizontal , accordion
featuredimages: yes or no
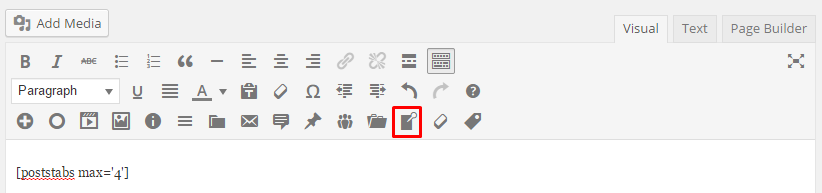
Post Tabs
You can use this shortcode to add your popular and latest posts as tabs to any page.
max: Maximum number of posts.
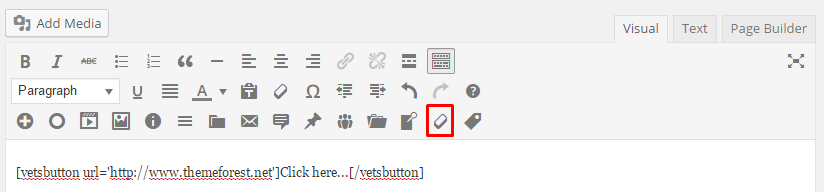
Button
You can use this shortcode to add a button to any page.
url: Destination url.
Label
You can use vetslabel shortcode to highlight texts.
Page Builder SiteOrigin
Linear page layouts are limiting when you’re trying to express a detailed idea. With SiteOrigin’s Page Builder, you can create columized page layouts populated with the widgets and themes you know and love. Its drag and drop interface is so easy to learn, that you'll be up and running in no time, you don't even need to change the theme you're using.
Getting Started
Page Builder is a WordPress plugin that lets you easily build and edit grid based pages.
Toolbar:You can use the toolbar to add a widget, add a new row of columns or to load prebuilt layouts.
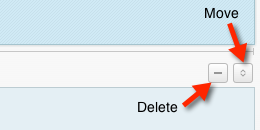
Row Actions:Use these buttons to delete and move a row. The up/down icon acts as a handle to pick up and drag the row up or down.
Page Row:This is a page row, with a single column.
Adding Columns
To add a new row of columns, click on the add columns button (3 upright bars). This opens a modal where you can choose how many columns you want in your new row.
Add a Widget
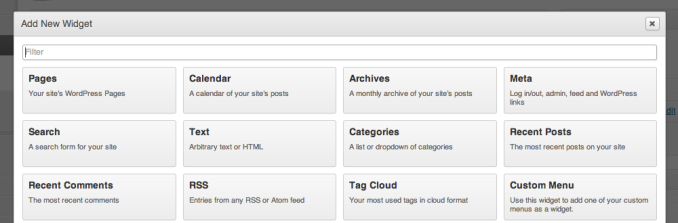
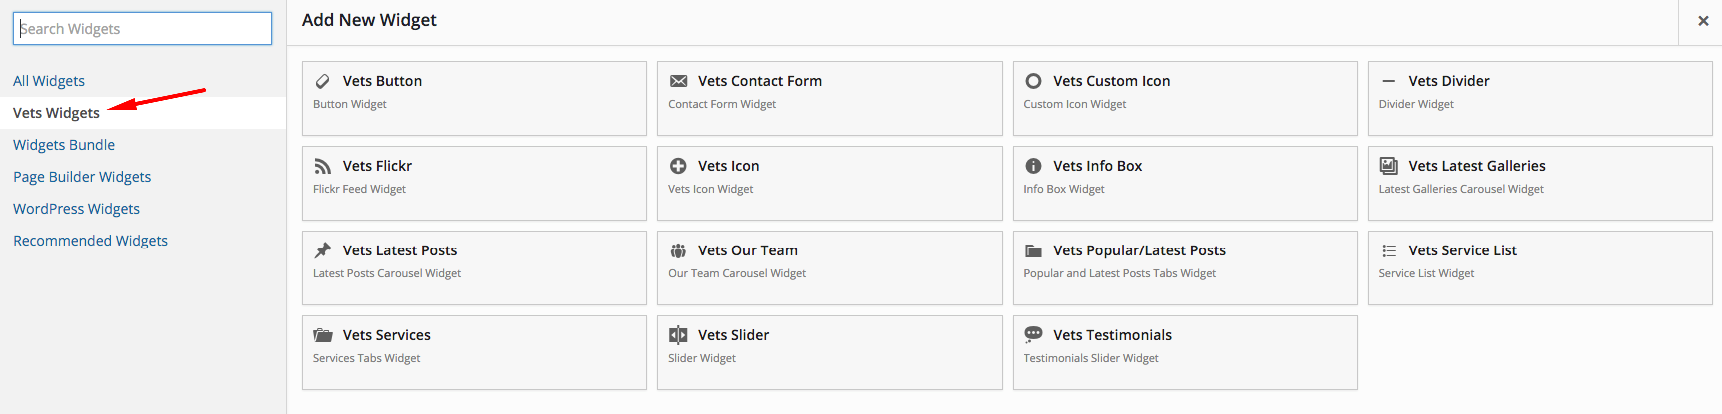
Widgets form the building blocks of your pages. Click on the add widget button (plus icon) in the toolbar to to bring up the widget selection interface.
This lets you select a widget to add to your page. You can use the filter up top to help sort through your widgets. Click on a widget to add it to your page.
To edit the content of a widget, click on the title. If you’d like to move the widget to another column, you can just pick it up and drag it.


Creating a Layout
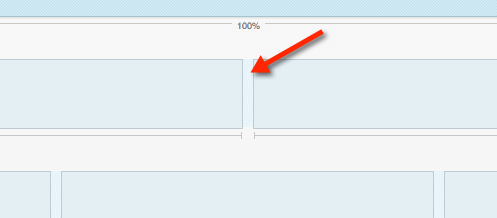
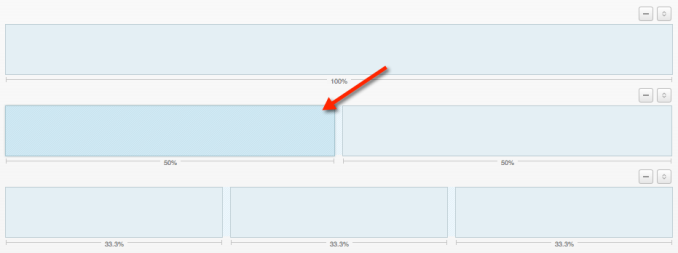
In general you’ll want to start by creating the general layout for your page. Click on the add columns button to add a new row of columns to your page. Page Builder creates your row with equally sized columns. If you want to change this up, you can click and drag the space between the columns to change their size.
You can also reposition entire rows by dragging the up/down arrow icon to the top right of a row. If you’d like to delete a row, click on the minus icon.
Adding Widgets
Click on the plus icon in the toolbar to add a widget.
When you click on a column, Page Builder highlights that column with a slightly darker shade of blue.
This is the column where any new widgets you add will go. You can easily move your widgets by picking them up and dragging them to another column. Each column can have as many widgets as you like.
Custom Widgets
There are 15 custom widgets in Vets-WP.
Vets Info Box: You can use this widget to add an info box.
Vets Slider: You can use this widget to add a slider. How to create sliders?
Vets Custom Icon: You can create your custom icon boxes with this widget.
Vets Service List: This widget displays a list of your services.How to create services?
Vets Services: This widget displays your services as tabs.
Vets Testimonials: This widget displays your testimonials as a slider.How to create testimonials?
Vets Popular/Latest Posts: This widget displays your popular and latest posts as a tabs. Popular posts based on how many comments they have.
Vets Our Team: This widget displays your team as a carousel.How to create team members?
Vets Contact Form: You can use this widget to add a contact form. You can find contact form settings at Appearance->Theme Settings->Contact.
Vets Divider: If you want to add a border and an extra space between columns or widgets, you can use this widget. You can use negative or positive numbers to adjust spacings.
Vets Flickr: This widget displays your Flickr images. To use this widget you should know your Flickr account ID. If you don't know your Flickr ID click here...
Vets Latest Posts: This widget displays your latest blog posts as a carousel.
Vets Latest Galleries: This widget displays your latest galleries as a carousel.
Vets Icon:You can create icon boxes with this widget. There are 54 available icons. To see the available icons click here...
Vets Button: You can add a button with this widget.
Ecwid Create an Online Store
Ecwid E-commerce Shopping Cart is Fast and Easy to Use. You can sell simultaneously on your website, mobile phones, social sites and marketplaces like eBay, Google Shopping, Yahoo and Shopping.com with Ecwid.
To create a store, first of all you should create an account at Ecwid.
You can visit Ecwid knowledge base to learn how to create a store, add products and categories etc.
To add your Ecwid store to your WordPress website, You should upload and activate the following plugin;
After the plugin activation, your online store page will be created automatically. All your products, categories etc. will be displayed on that page.
To use built-in Ecwid css theme, go to Appearance->Theme Settings->Ecwid Store and check "Activate Custom Ecwid Skin" box.
Support
Beginner's Guide to WordPress
If you are not an experienced WordPress user, I suggest you to start from this free course. After taking this free course you'll be completely comfortable with installing WordPress, adding new content, customising WordPress themes, using WordPress plugins, and managing existing blogs or websites.
Help Documentation
Many support queries and technical questions will already be answered in this documentation. So please take the time to read through all the sections.
Knowledge Base
Your question may already be answered in the knowledge base...
Item Support
Item support is a service provided by many authors on ThemeForest and CodeCanyon.
What's included in item support
Answering questions about how to use the item
Answering technical questions about the item (and included third party assets)
Help with defects in the item or included third party assets
Item updates to ensure ongoing compatibility and to resolve security vulnerabilities
What's NOT included in item support
Item customization
Installation of the item
Hosting, server environment, or software
Where can I get the item support?
Item support is a service provided by many authors on ThemeForest and CodeCanyon.

Compatible Plugins with Vets-WP
SiteOrigin Page Builder
Linear page layouts are limiting when you’re trying to express a detailed idea. With SiteOrigin’s Page Builder, you can create columized page layouts populated with the widgets and themes you know and love. Its drag and drop interface is so easy to learn, that you'll be up and running in no time.
Ecwid Shopping Cart
Ecwid is a full-featured shopping cart that can be added to any WordPress site in less than 5 minutes...
Black Studio TinyMCE Widget
One plugin you’ll almost always want to install after installing Page Builder is Black Studio’s wonderful TinyMCE widget. TinyMCE is the same rich text editor that you use when creating posts in WordPress. Black Studio TinyMCE gives you this editor as a widget, which you can use in your Page Builder pages.
WPML Plugin
WPML makes it easy to build multilingual sites and run them. It’s powerful enough for corporate sites, yet simple for blogs.
Contact Form 7
Contact Form 7 can manage multiple contact forms, plus you can customize the form and the mail contents flexibly with simple markup. The form supports Ajax-powered submitting, CAPTCHA, Akismet spam filtering and so on.
Intuitive Custom Post Order
You can use this plugin to change the order of the custom post types. After the plugin activation, you should select sortable items from 'Intuitive CPT' menu of Setting menu in WordPress.
Credits Files
I've used the following scripts and other files as listed;
JavaScript
- jQuery
- jQuery Backstretch
- Flickr Feed
- Nerve Slider
- Owl carousel
- Caroufredsel
- Responsive Tabs
- Morphext Word Rotator
- LightGallery