Installation
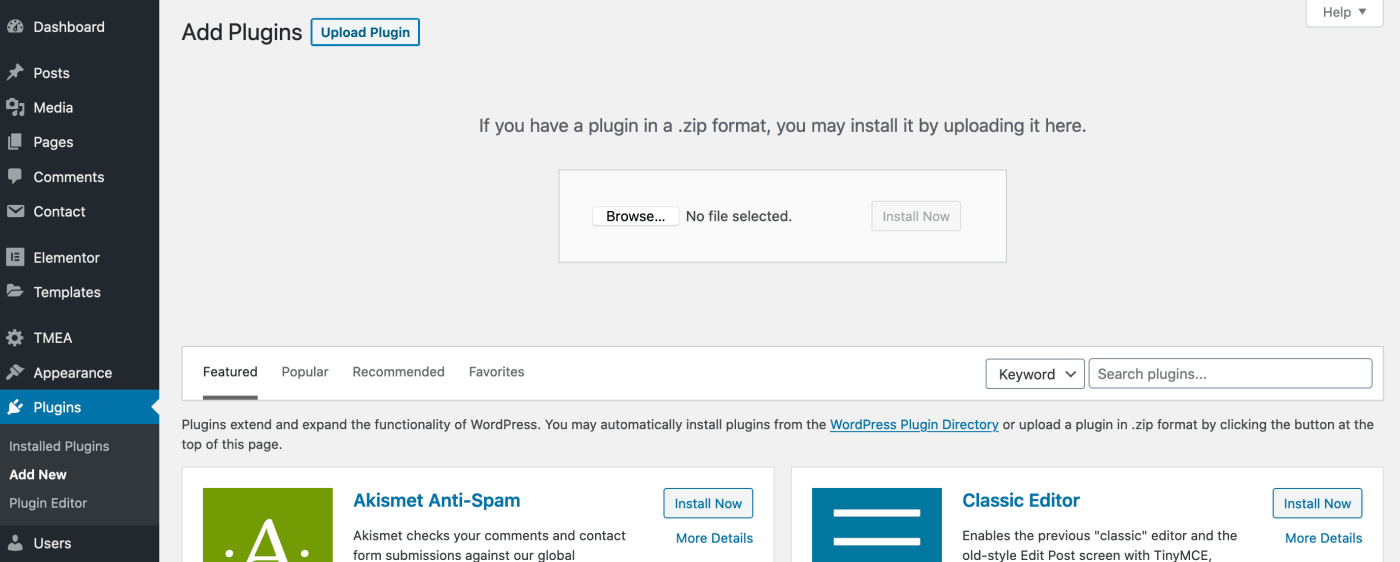
The first thing you need to do when you want to install a new WordPress plugin is to login to your site admin page. Once there, go to Plugins -> Add New. Click "Upload Plugin" button and upload the zip file from your local hard drive.
Settings
General
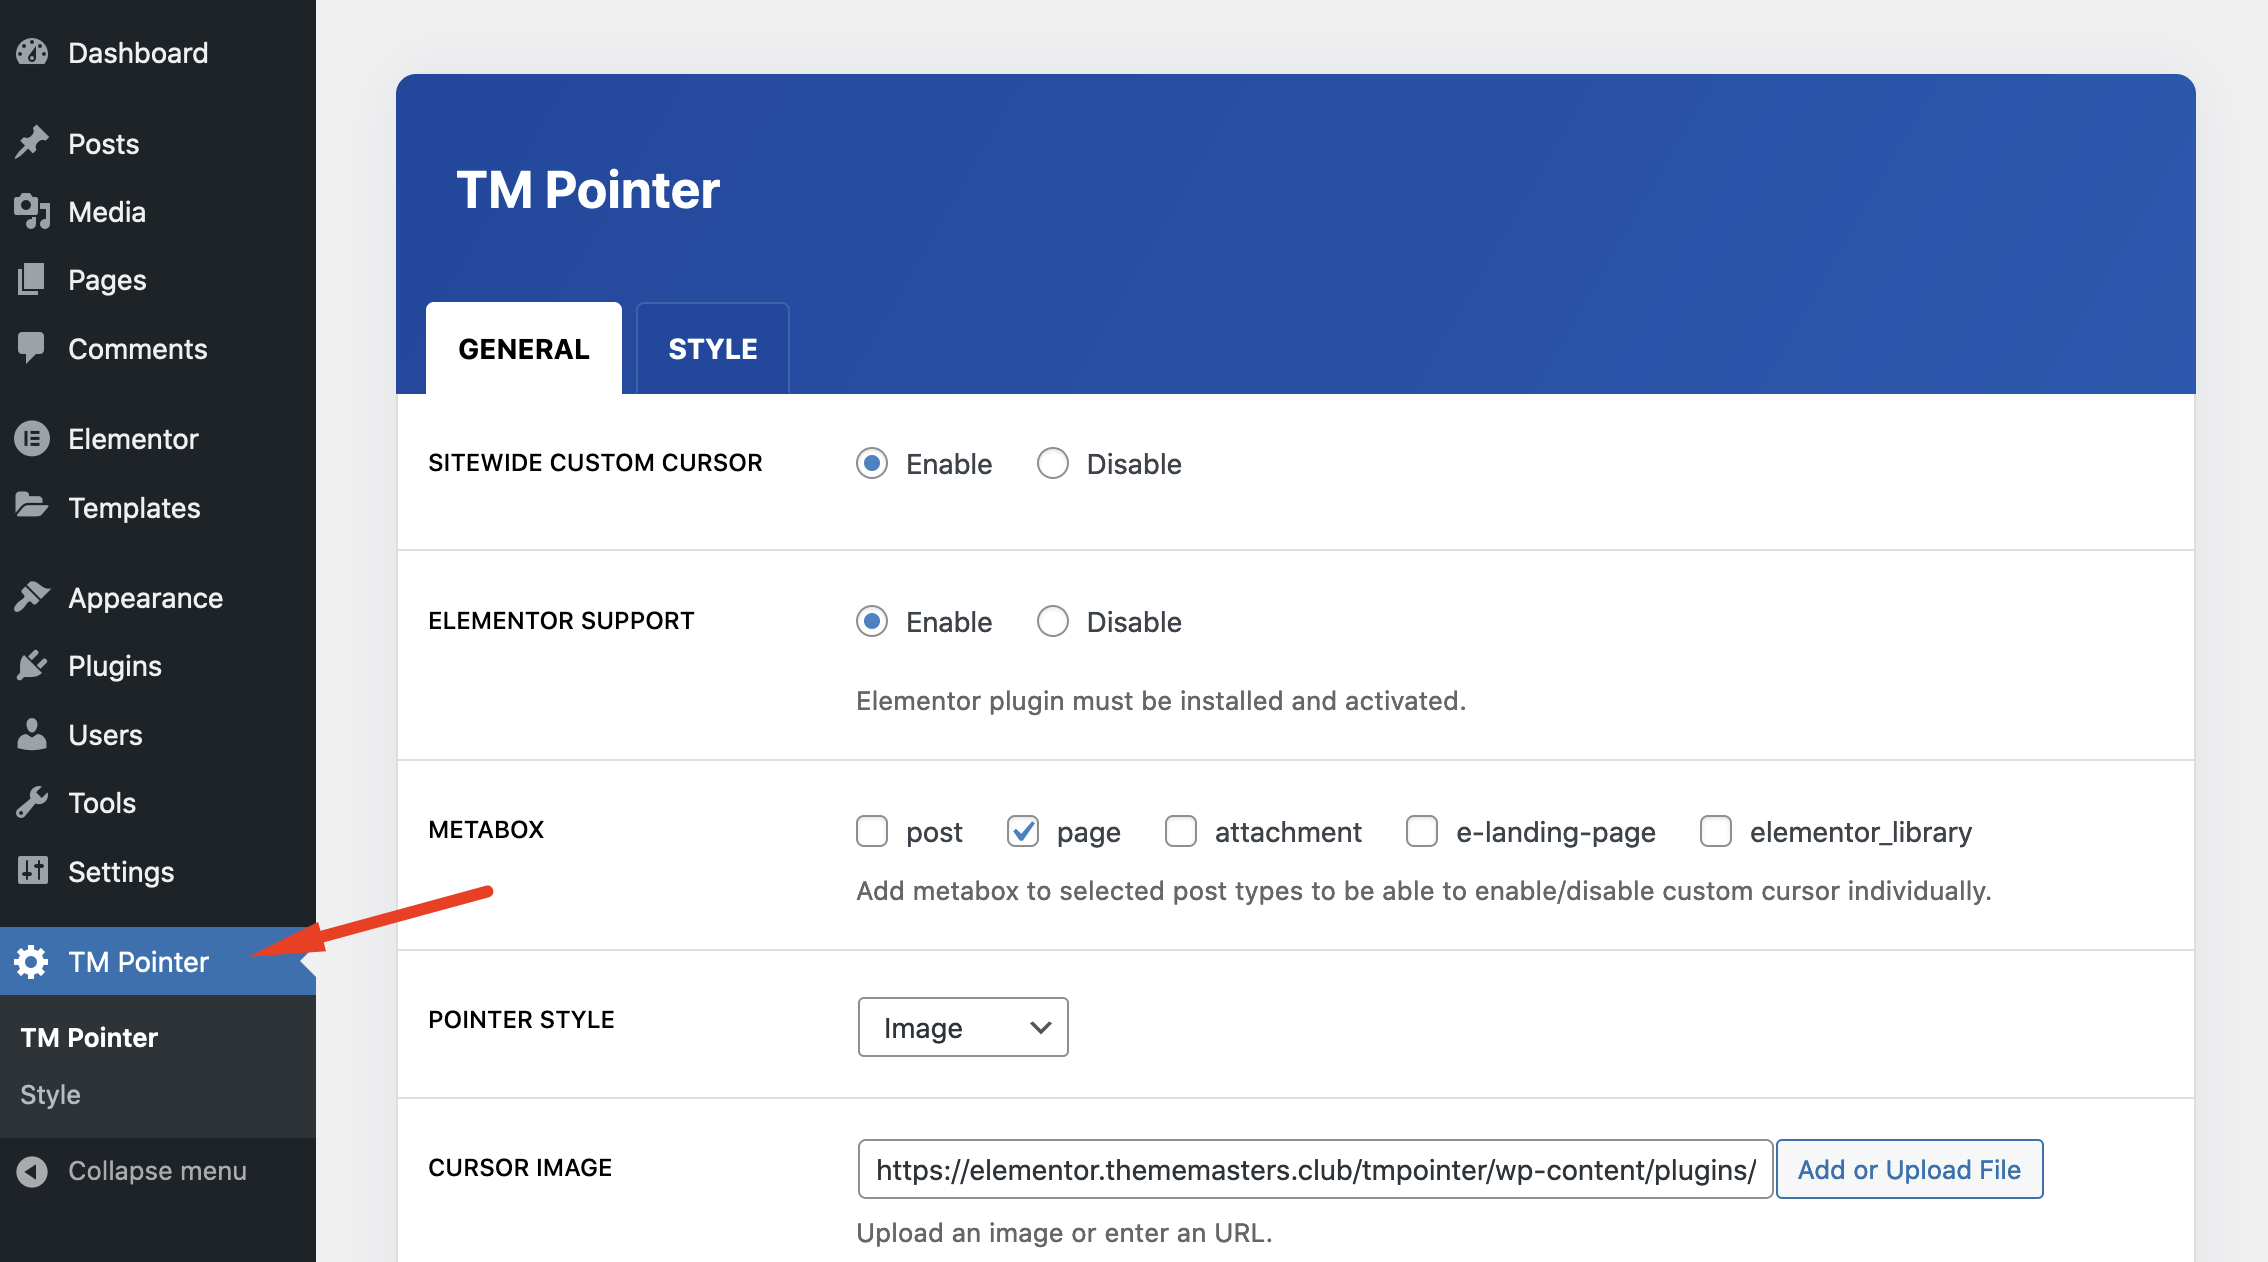
Sitewide Custom Cursor: This is the easiest way if you want to add the same cursor to everywhere on your site. If you want to target only specific pages, disable it and use the metabox or Elementor to create page specific cursors.
Elementor Support: If you installed & activated Elementor, this feature allow you to create custom cursors for sections and columns. If you are not going to use Elementor to create custom cursors you can disable it.
Metabox: TM Pointer metabox will added to selected post types. Metabox allows you to create different cursors for the posts. If you don't want to add it to anywhere, you can select "attachment" since the field requires at least one option.
Pointer Style: The pre-defined style of the cursor.
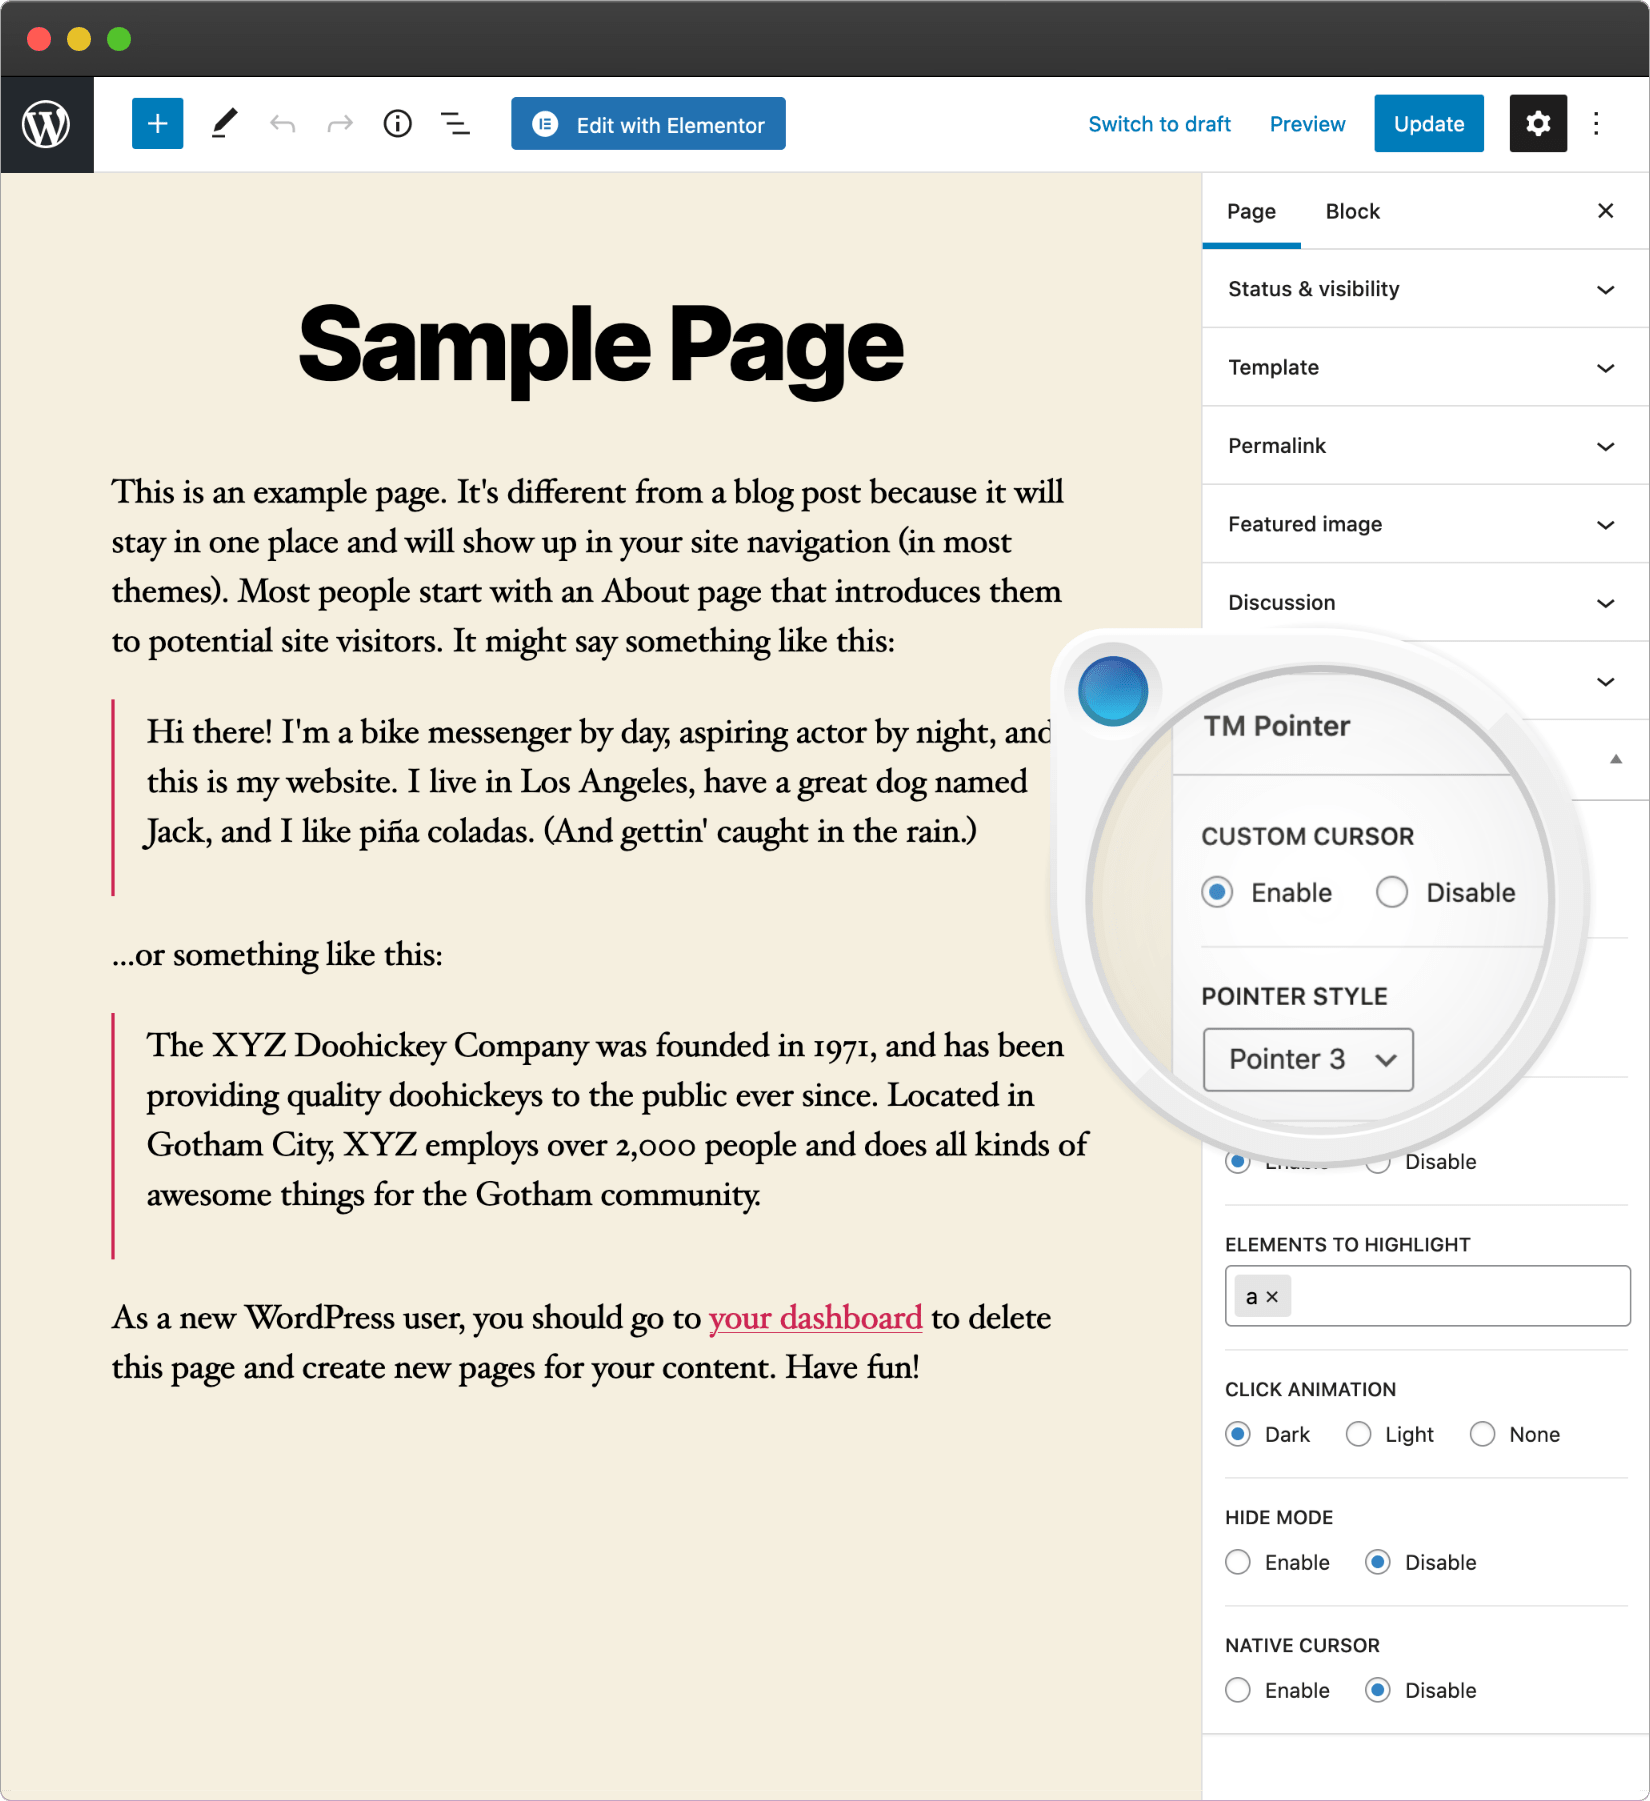
Highlight: "Highlight" is the animation when mouseover on any of the selected elements. You can use HTML tag (For example; a, h1, p), id (For example; #myelement) or class (For example; .myclass) to target elements. a is the link tag.
Click Animation: This is the animation when you click on any element.
Hide Mode: If you enable this feature, the cursor will be invisible after the selected period of time it is not moving.
Native Cursor: Native cursor is the default cursor of the browser. Since we are using the custom cursor, in most cases there is no need for the native cursor.
Velocity: The default cursor velocity is 1. You can play with these settings to manipulate the velocity of the cursor or node. node is the secondary element which is used to follow the cursor and create animations.
Style
This section contains all style settings of the custom cursors. You will see a yellow star beside on your default "cursor style". "Sitewide cursor" and the other cursors which you have created from the metabox, use these style settings. If you need more flexibility, you can use Elementor since sections and columns have dedicated style settings.
Elementor Page Builder
Elementor is the best WordPress Page Builder, with over 5.000.000 active installs. You can create a beautiful website using a simple, intuitive drag and drop Interface. To use TM Elementor Addons, first of all you must install Elementor Page Builder. Download Elementor.
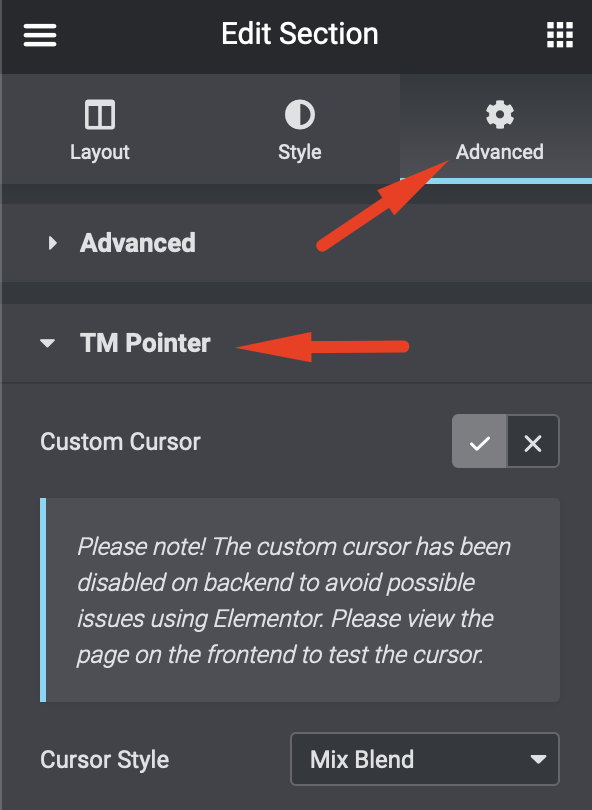
Section & Column Settings
You can find TM Pointer settings in "Advanced" tab.
Developers
How To Register A New Custom Cursor Style
You can use tm_pointer_anims filter to register a new custom cursor like the following;
function my_custom_cursor($animations){
    $animations['my-pointer'] = esc_html__( 'My Pointer', 'tmpointer' );
    return $animations;
}
add_filter('tm_pointer_anims', 'my_custom_cursor');
Then, you you can use the following structure for your custom CSS;
/* ================= CURSOR ================== */
.my-pointer.tm-cursor {
}
/* ================= CURSOR BEFORE ================== */
.my-pointer.tm-cursor:before {
}
/* ================= CURSOR EXPAND (HIGHLIGHT) ================== */
.my-pointer.tm-cursor.tm-expand:before {
}
/* ================= NODE (CURSOR FOLLOWER) ================== */
.my-pointer.tm-node {
}
/* ================= NODE BEFORE ================== */
.my-pointer.tm-node:before {
}
/* ================= NODE EXPAND (HIGHLIGHT) ================== */
.my-pointer.tm-node.tm-expand:before {
}